Zesty 5-Min Dilly Beans Delight Recipe
Introduction
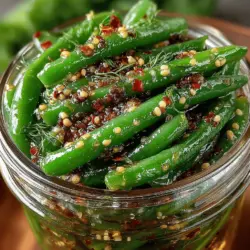
In recent years, pickled vegetables have surged in popularity, captivating food enthusiasts and home cooks alike. This time-honored method of preserving fresh produce not only extends its shelf life but also elevates its flavor profile, making it a cherished addition to meals and snacks. Among the myriad of pickled options available, Dilly Beans stand out as a unique and tangy treat. These zesty green beans, infused with the aromatic essence of dill, serve as both a delightful snack and an eye-catching side dish that can enhance any dining experience.
What sets this Zesty 5-Min Dilly Beans Delight recipe apart is its remarkable simplicity and speed. In just five minutes, you can prepare a batch of pickled green beans that are bursting with flavor, making it an ideal choice for busy lifestyles. Whether you need a quick addition to your lunchbox or a flavorful accompaniment to your dinner, this recipe fits the bill. The bright, tangy essence of the pickling solution combined with the crispness of fresh green beans creates an irresistible taste sensation that is both refreshing and satisfying.
Not only do Dilly Beans offer a unique burst of flavor, but they also come packed with health benefits. Green beans are a low-calorie vegetable rich in vitamins and minerals, including Vitamin C, Vitamin K, and folate. When combined with the anti-inflammatory properties of dill, this pickled delicacy becomes not only a delicious choice but a nutritious one as well.
Understanding Dilly Beans
Dilly Beans are a delightful culinary creation that combines the crispness of green beans with the aromatic flavor of dill pickles. The origin of Dilly Beans can be traced back to traditional pickling methods that date back centuries, where preservation was essential for survival during harsh winters. This process not only allowed for the storage of seasonal produce but also enhanced the flavors through fermentation and brining.
Pickling plays a crucial role in food preservation, as it creates an environment that inhibits the growth of spoilage-causing microorganisms. The process involves immersing vegetables in a seasoned vinegar brine, which infuses them with flavor while extending their lifespan. The tangy taste and crunchy texture of Dilly Beans make them a popular choice among pickled vegetable enthusiasts, and their versatility allows them to fit seamlessly into various cuisines.
From a nutritional standpoint, Dilly Beans are an excellent choice for those looking to incorporate more vegetables into their diet. Green beans are low in calories, high in fiber, and a great source of antioxidants. Dill, on the other hand, adds not only flavor but also health benefits, such as aiding digestion and acting as a natural antimicrobial agent. Furthermore, Dilly Beans cater to various dietary preferences, making them suitable for vegans and those following gluten-free diets.
Ingredients Overview
To create your Zesty 5-Min Dilly Beans Delight, you’ll need a handful of fresh ingredients that come together to create a flavorful and vibrant dish.
– Fresh Green Beans: The star of this recipe, fresh green beans, are crucial for achieving that perfect crunch. When selecting green beans at the market, look for vibrant, firm beans with no blemishes or signs of wilting. Freshness is key; the more recently harvested the beans are, the better the flavor and texture will be.
– White Vinegar: A vital component of the pickling process, white vinegar provides the necessary acidity that helps preserve the beans while balancing the overall flavor profile. While white vinegar is the traditional choice, variations such as apple cider vinegar or rice vinegar can introduce different flavor notes, so feel free to experiment based on your preference.
– Sugar and Sea Salt: Sugar and salt are essential for enhancing flavors and preserving the Dilly Beans. Sugar helps balance the acidity of the vinegar, while sea salt contributes to the brining process. For those looking for alternatives, consider using honey or agave syrup for a natural sweetness that complements the tangy profile.
– Garlic and Dill: The aromatic addition of garlic and dill is what truly elevates this recipe. Garlic not only adds a savory depth to the flavor but is also known for its numerous health benefits, including immune-boosting properties. Dill, with its distinct flavor, complements the green beans beautifully and is packed with antioxidants.
– Mustard Seeds and Red Pepper Flakes: Spices like mustard seeds and red pepper flakes play a significant role in enhancing the depth of flavor in your Dilly Beans. Mustard seeds add a slight pungency, while red pepper flakes introduce a touch of heat. Depending on your spice tolerance, you can easily customize the level of heat to suit your taste.
Step-by-Step Instructions
Now that you have a clear understanding of the ingredients and their roles in this recipe, it’s time to dive into the preparation. Follow these simple steps to create your Zesty 5-Min Dilly Beans Delight:
1. Prepare the Green Beans: Start by rinsing the fresh green beans thoroughly under cold water. Trim the ends to ensure that each bean is clean and ready to absorb the pickling flavors. Aim for uniformity in size to promote even pickling.
2. Make the Pickling Brine: In a small saucepan, combine equal parts white vinegar and water, adding in the sugar and sea salt. Heat the mixture over medium heat, stirring until the sugar and salt have fully dissolved. This step is key to ensuring a well-balanced brine.
3. Add Flavorings: Once the brine is ready, remove it from the heat and stir in the minced garlic, dill, mustard seeds, and red pepper flakes. Allow the mixture to cool slightly, as this will help preserve the vibrant flavors of the ingredients.
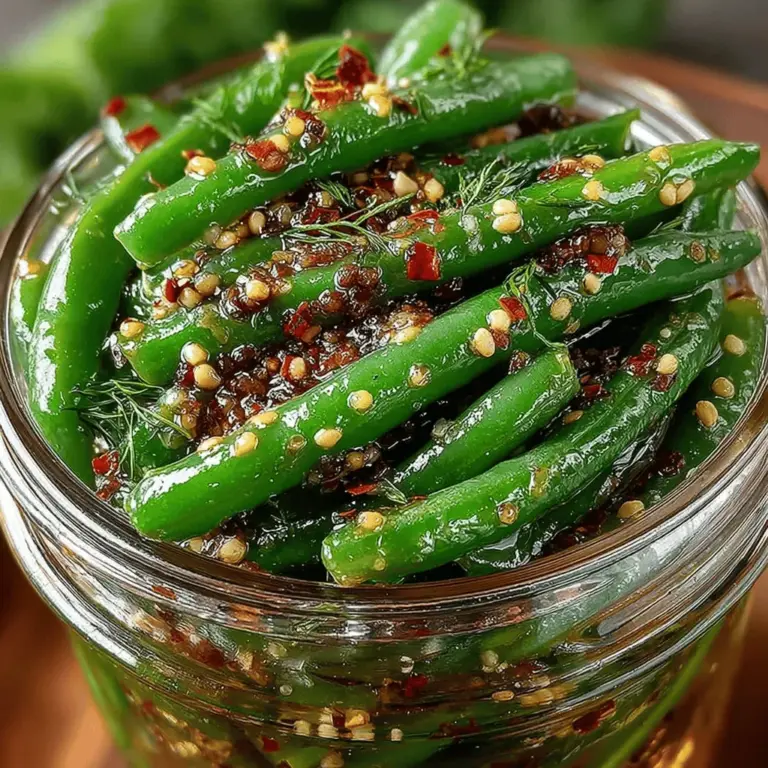
4. Pack the Beans: While the brine is cooling, pack the prepared green beans into a clean jar. You can arrange them vertically to create an appealing display, ensuring that the beans fit snugly without being overly compressed.
5. Pour the Brine: Carefully pour the cooled pickling brine over the green beans, making sure they are fully submerged. If there are any air bubbles, gently tap the jar on the counter to help release them. Seal the jar tightly and let it sit at room temperature for about 30 minutes to allow the flavors to meld.
This initial preparation will yield a vibrant and tangy Dilly Beans dish that is perfect for snacking or serving alongside your favorite meals. As the flavors continue to develop, you’ll find that these zesty beans become even more delectable. Enjoy the process and look forward to the delightful crunch and invigorating taste that awaits you!
Blanching the Green Beans
Blanching is a crucial step in the preparation of zesty dilly beans, as it helps retain the vibrant green color and crisp texture of the beans. This process involves briefly boiling the beans before cooling them rapidly in ice water. Not only does blanching enhance the visual appeal of your dilly beans, but it also helps to preserve their nutrients.
Detailed Instructions on How to Properly Blanch and Cool Green Beans
1. Prepare the Beans: Start by washing the green beans under cold water to remove any dirt or impurities. Trim the ends of the beans by snapping them off or cutting them with a knife.
2. Boil Water: In a large pot, bring a sufficient amount of water to a rolling boil. You’ll need about 1 gallon of water for every pound of green beans.
3. Blanch the Beans: Once the water is boiling, carefully add the green beans. Blanch them for about 2 to 3 minutes. The goal is to cook them just enough to brighten their color without making them mushy.
4. Ice Bath: Immediately after blanching, transfer the green beans to a bowl of ice water using a slotted spoon or a colander. This ice bath stops the cooking process and locks in the bright color and crisp texture. Let the beans sit in the ice bath for at least 5 minutes.
5. Drain: Once cooled, drain the beans thoroughly, ensuring there is no excess water left, as this can dilute the pickling brine.
Preparing the Brine
The pickling brine is the heart of your dilly beans, imparting tanginess and flavor. A well-prepared brine will ensure your beans are delicious and satisfying.
Step-by-Step Guide on Creating the Pickling Brine
1. Ingredients: In a medium saucepan, combine equal parts water and white vinegar. For every cup of water, add one cup of vinegar. This balance creates the perfect acidity level for pickling.
2. Add Flavorings: Include 2 tablespoons of kosher salt and 1 tablespoon of sugar. The salt enhances flavor, while the sugar balances the acidity.
3. Simmer: Bring the mixture to a simmer over medium heat. Stir occasionally to dissolve the salt and sugar completely. Allow it to simmer for about 5 minutes. This step is essential as it helps to meld the flavors together.
4. Adjusting the Brine: Taste the brine and adjust according to your preference. If you like it tangier, add more vinegar. For a sweeter profile, increase the sugar slightly.
5. Infuse Flavor: Optional spices, such as mustard seeds, coriander seeds, or red pepper flakes, can be added to the brine for extra zing.
Packing the Jars
Packing the green beans efficiently into jars is important for ensuring even flavor distribution and presentation.
Techniques for Packing Green Beans Efficiently
1. Select Jars: Use clean, sterilized jars with tight-sealing lids. Mason jars are ideal for this purpose.
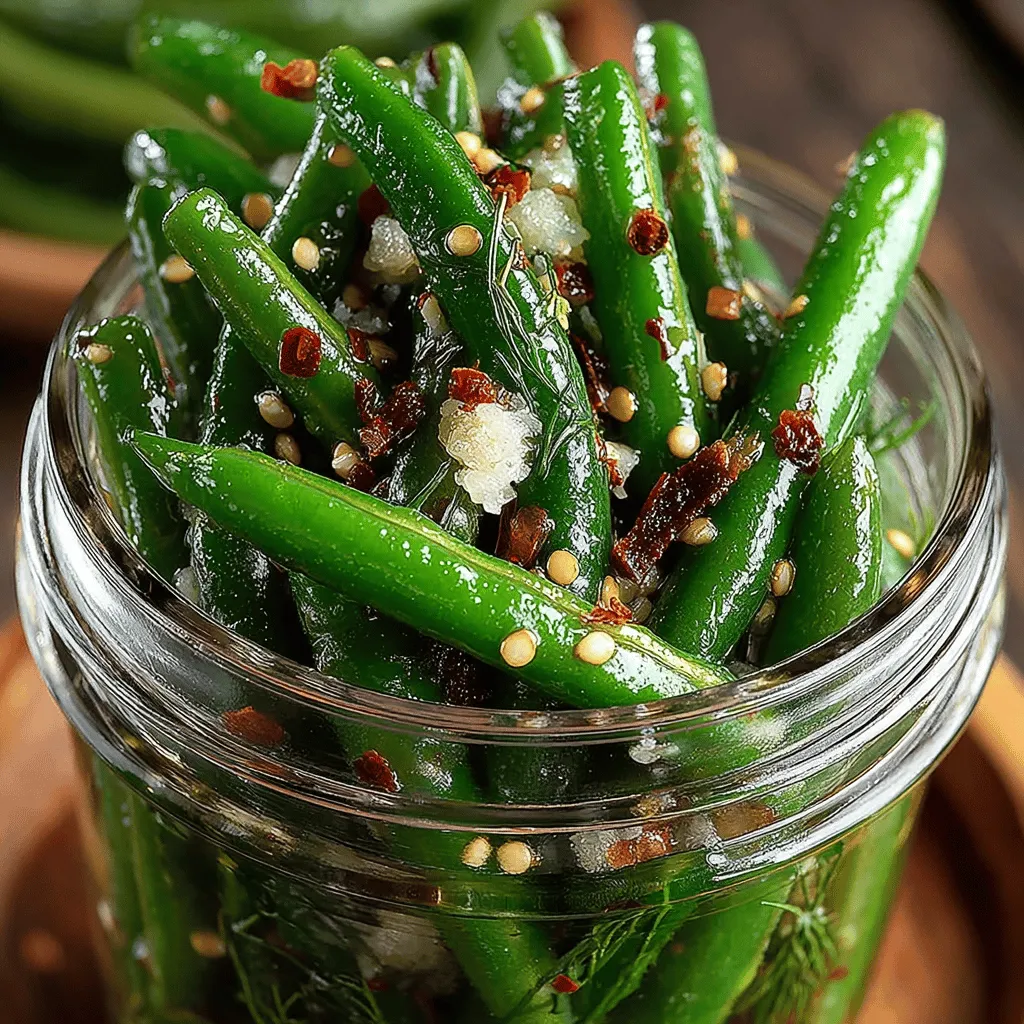
2. Layering the Beans: Begin packing the blanched green beans vertically into the jars, ensuring they are packed tightly but not overly squished. This helps maintain their integrity and makes for a better presentation.
3. Enhancing Flavor: As you layer the beans, add sliced garlic cloves and fresh dill sprigs between the layers. This layering technique allows the flavors to infuse throughout the beans effectively.
Pouring the Brine
Once your jars are packed, it’s time to pour in the brine, a critical step in ensuring that every bean is well-preserved and flavorful.
Importance of Ensuring the Green Beans Are Fully Submerged
1. Pouring the Brine: Carefully ladle the hot pickling brine over the packed green beans in each jar. Ensure that the brine completely covers the beans, leaving about half an inch of headspace at the top of each jar.
2. Avoiding Air Bubbles: To eliminate air bubbles, gently tap the jars or use a clean utensil to press down on the beans. This step is crucial as trapped air can lead to spoilage.
3. Sealing the Jars: Wipe the rims of the jars with a clean cloth to remove any residue. Secure the lids tightly but not overly so, allowing for some expansion as the beans cool.
Sealing and Chilling
The cooling process is essential for developing the flavors of your dilly beans and ensuring they remain fresh.
Explanation of the Cooling Process and Why It’s Essential
1. Cooling the Jars: Allow the jars to cool at room temperature for about 30 minutes. This gradual cooling helps create a vacuum seal as the contents contract.
2. Refrigeration: After cooling, transfer the jars to the refrigerator. Let them chill for at least 24 hours before consuming. This waiting period allows the flavors to meld and intensify, resulting in a more flavorful pickle.
Suggested Refrigeration Times for Optimal Flavor Development
For the best flavor, aim to refrigerate your dilly beans for at least a week. This time allows the brine to penetrate the beans fully, enhancing their taste.
Serving Suggestions
Dilly beans are not only a delightful snack on their own but can also elevate various dishes. Here are some creative ways to enjoy them:
1. As a Side Dish: Serve dilly beans as a side dish alongside grilled meats or fish. Their tangy crunch complements rich flavors beautifully.
2. In Salads: Chop dilly beans into bite-sized pieces and toss them into salads for an extra zing. They work wonderfully in potato salads, pasta salads, or green salads.
3. In Sandwiches: Add dilly beans to sandwiches for a crunchy, flavorful layer. They pair exceptionally well in deli-style sandwiches with meats and cheeses.
4. Appetizer Platters: Arrange dilly beans on a charcuterie board alongside cheeses, cured meats, olives, and crackers. Their bright color and unique taste will draw attention.
Storage and Shelf Life
To maintain the freshness of your dilly beans, proper storage is essential.
Best Practices for Storing Dilly Beans to Maintain Freshness
1. Refrigeration: Store your dilly beans in the refrigerator. They will stay fresh for up to 2 months if properly sealed.
2. Avoid Exposure: Keep the jars tightly sealed to prevent exposure to air, which can lead to spoilage.
Discussion on the Shelf Life of Refrigerated Dilly Beans
Refrigerated dilly beans will maintain their quality for about 2 to 3 months. After this period, while they may still be safe to eat, the texture and flavor may begin to diminish.
Safety Tips for Pickled Foods and Signs of Spoilage
Always check for signs of spoilage before consuming your dilly beans. If you notice any off smells, discoloration, or mold, it’s best to discard them. When in doubt, throw it out—food safety is paramount.
Conclusion
Making zesty dilly beans is not only a quick and easy process but also a rewarding culinary adventure. These pickled delights are versatile, perfect for snacking, enhancing meals, or serving at gatherings. Don’t hesitate to experiment with different herbs and spices to create your unique flavors. The satisfaction of crafting your homemade pickled treats is unparalleled, allowing you to enjoy the vibrant taste of summer all year round. So grab some fresh green beans and start your pickling journey today!