Introduction
Tiramisu, a renowned Italian dessert, has captured the hearts and palates of many since its creation in the 1960s. Its name translates to “pick me up,” which is quite fitting given the luscious layers of coffee-soaked ladyfingers, creamy mascarpone, and a dusting of cocoa that tantalize the taste buds and provide a delightful energy boost. Originating from the Veneto region of Italy, tiramisu has evolved over the years, transitioning from a simple treat into a beloved dessert served at restaurants and homes around the world.
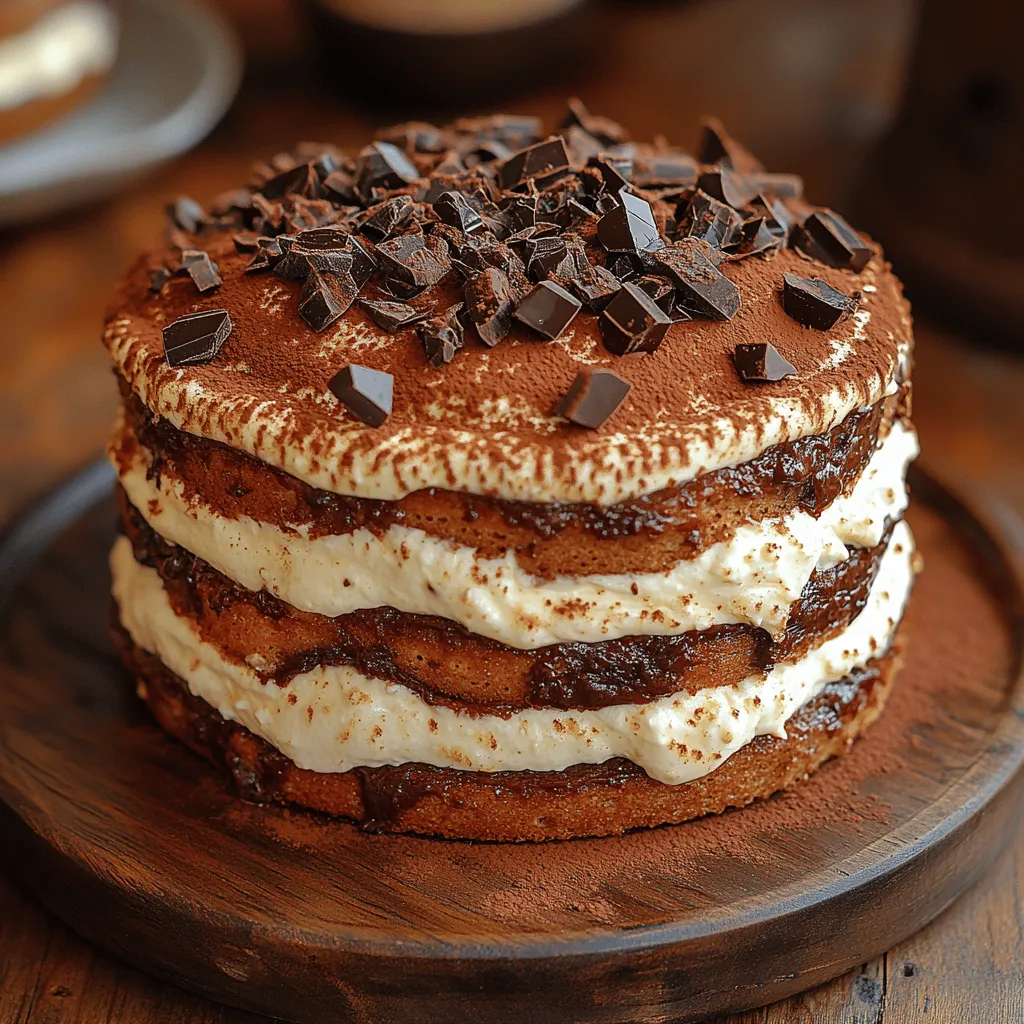
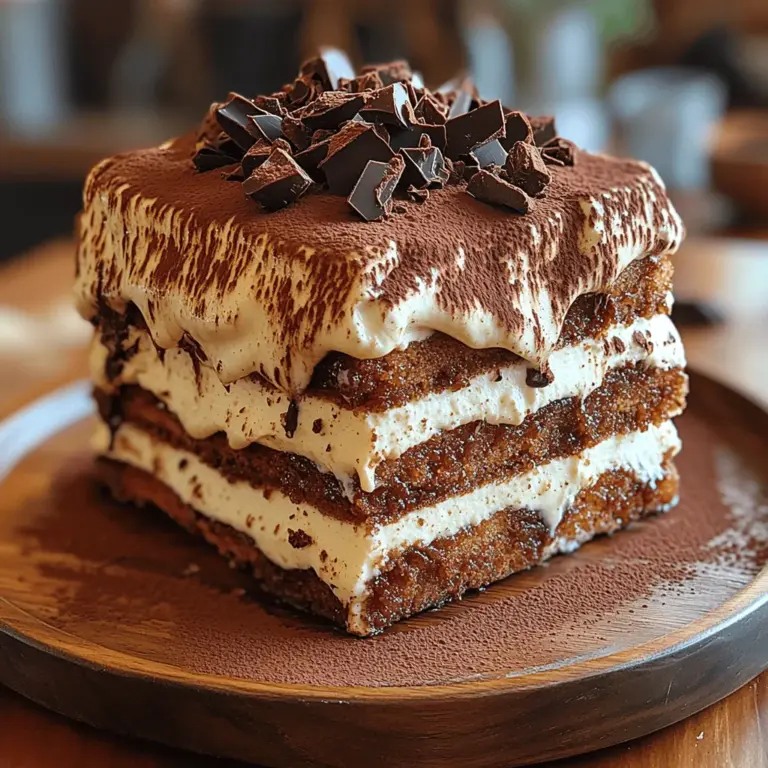
As food enthusiasts continue to seek innovative ways to present traditional recipes, the Heavenly Tiramisu Layer Cake emerges as a modern twist on this classic. This cake takes all the beloved elements of tiramisu—rich coffee flavor, creamy texture, and that signature cocoa finish—and elevates them into a stunning layered cake format. With its rich flavors and layered textures, it stands as an ideal centerpiece for special occasions, whether it’s a birthday celebration, an anniversary, or simply a gathering of friends and family.
In this recipe, we will guide you through the process of creating a Heavenly Tiramisu Layer Cake that not only pays homage to its roots but also transforms it into a visually captivating dessert. This cake promises to impress your guests and satisfy your cravings for something sweet and indulgent.
Understanding the Components of Tiramisu Layer Cake
To truly appreciate the Heavenly Tiramisu Layer Cake, it’s essential to understand the fundamental components that make traditional tiramisu so beloved. At its core, a classic tiramisu consists of a few key ingredients: ladyfingers (savoiardi), a rich coffee blend, a smooth mascarpone cheese mixture, and a sprinkling of cocoa powder. Each element plays a crucial role in creating the harmonious balance of flavors and textures that tiramisu is known for.
1. Ladyfingers: These light and airy sponge cookies are the foundation of tiramisu. They readily absorb coffee, allowing them to become infused with rich flavors without becoming overly soggy.
2. Coffee: The essence of tiramisu, coffee is not only a flavoring agent but also a key ingredient that brings the dessert to life. Its bold notes complement the sweetness of the mascarpone and the cocoa powder, creating a well-rounded taste experience.
3. Mascarpone Cheese: This creamy Italian cheese serves as the base for the tiramisu filling. Its rich, velvety texture is essential for achieving the signature creaminess that distinguishes tiramisu from other desserts.
4. Cocoa Powder: A dusting of cocoa provides a bitter contrast to the sweet layers, creating a perfect balance and enhancing the overall flavor profile.
The Heavenly Tiramisu Layer Cake incorporates these essential components but presents them in a way that enhances the classic tiramisu experience. By stacking layers of chocolate cake infused with coffee syrup and mascarpone frosting, this cake creates a delightful interplay of flavors and textures that will leave your guests craving more.
The Coffee Syrup: The Heart of the Flavor
At the center of any tiramisu recipe is coffee, and for the Heavenly Tiramisu Layer Cake, we will create a rich coffee syrup that will infuse each layer of cake with robust flavor. The coffee syrup is a vital component that not only adds moisture to the cake but also enhances the overall taste, making it a key element in achieving the authentic tiramisu experience.
Ingredients Breakdown for Coffee Syrup
To prepare the coffee syrup, you will need the following ingredients:
– Strong Brewed Coffee: The base of your syrup, brewed to a robust strength. Opt for high-quality coffee to ensure a rich flavor.
– Coffee Liqueur: This adds depth and complexity to the syrup. Popular choices include Kahlúa or Tia Maria, but feel free to choose your favorite brand.
– Sugar: A touch of sugar will help balance the bitterness of the coffee while enhancing its natural sweetness.
Step-by-Step Process of Preparing the Coffee Syrup
1. Brew the Coffee: Start by brewing a strong pot of coffee using your preferred method. Aim for a concentrate that will provide a robust flavor when mixed with the other ingredients.
2. Combine Ingredients: In a small saucepan, combine 1 cup of freshly brewed coffee, 1/4 cup of coffee liqueur, and 2 tablespoons of sugar. Heat the mixture over medium heat, stirring occasionally until the sugar dissolves completely.
3. Simmer: Once the sugar has dissolved, bring the mixture to a gentle simmer. Allow it to simmer for about 5 minutes to concentrate the flavors and slightly reduce the liquid. Be careful not to let it boil vigorously, as this can alter the flavor profile.
4. Cool: Remove the saucepan from heat and allow the coffee syrup to cool completely before using it in your cake. This syrup can be made ahead of time and stored in an airtight container in the refrigerator for up to a week.
Tips for Choosing the Right Coffee and Liqueur
To achieve the best results with your coffee syrup, consider the following tips:
– Quality Matters: Choose freshly ground coffee beans for brewing, as this will significantly impact the flavor of your syrup. Look for a medium to dark roast for a fuller taste.
– Experiment with Flavors: While coffee liqueur is traditional, feel free to experiment with flavored liqueurs or even a splash of espresso for an extra kick.
– Sweetness Level: Adjust the amount of sugar according to your taste preferences. If you prefer a less sweet syrup, start with less sugar and gradually add more if needed.
Baking the Perfect Cake Layers
Now that you have your coffee syrup ready, it’s time to focus on baking the cake layers. The Heavenly Tiramisu Layer Cake features rich chocolate cake layers, beautifully complemented by the coffee syrup and creamy mascarpone frosting. Achieving the perfect cake requires attention to detail in both the ingredients and the baking process.
Flavor Profile of the Cake
The flavor profile of the cake layers combines the rich, deep notes of chocolate with the aromatic essence of coffee. This dual flavor experience enhances the overall tiramisu theme, creating a harmonious blend that is sure to please any chocolate or coffee lover.
Ingredients Breakdown for the Cake
To create the cake layers, gather the following ingredients:
– All-Purpose Flour: The foundation of your cake, providing structure.
– Cocoa Powder: For that rich chocolate flavor.
– Granulated Sugar: To sweeten the cake and create a tender crumb.
– Baking Powder and Baking Soda: For leavening, ensuring your cake rises perfectly.
– Salt: Enhances the flavors and balances sweetness.
– Eggs: Provide moisture and help bind the ingredients.
– Milk: Adds moisture to the batter.
– Vegetable Oil: Creates a moist texture and keeps the cake tender.
– Vanilla Extract: Enhances the overall flavor of the cake.
Detailed Instructions on Mixing and Baking the Cake Layers
1. Preheat Your Oven: Start by preheating your oven to 350°F (175°C). Prepare two 9-inch round cake pans by greasing and flouring them to ensure the cakes release easily after baking.
2. Mix Dry Ingredients: In a large mixing bowl, whisk together 1 ¾ cups of all-purpose flour, ¾ cup of unsweetened cocoa powder, 2 cups of granulated sugar, 1 ½ teaspoons of baking powder, 1 ½ teaspoons of baking soda, and ½ teaspoon of salt. This will ensure that all your dry ingredients are evenly distributed.
3. Combine Wet Ingredients: In another bowl, beat together 2 large eggs, 1 cup of milk, ½ cup of vegetable oil, and 2 teaspoons of vanilla extract until well combined.
4. Combine Mixtures: Gradually add the wet ingredients to the dry ingredients, mixing on medium speed for about 2 minutes until the batter is smooth and well combined. Be careful not to overmix, as this can lead to a dense cake.
5. Baking the Cake Layers: Divide the batter evenly between the prepared cake pans, smoothing the tops with a spatula. Bake in the preheated oven for 30-35 minutes or until a toothpick inserted into the center comes out clean.
6. Cooling: Once baked, remove the cakes from the oven and allow them to cool in the pans for about 10 minutes. Then, transfer the cakes to a wire rack to cool completely. This step is crucial for preventing a soggy cake when assembling your layers.
Importance of Measuring and Baking Times
Accuracy in measuring your ingredients is key to achieving the perfect texture in your cake layers. Use a kitchen scale for precise measurements, especially for the flour and cocoa powder. Additionally, keep an eye on your baking times; every oven is different, and slight variations may occur. Always check for doneness using a toothpick, as overbaking can lead to a dry cake.
By following these steps and paying attention to the details, you’ll create delicious cake layers that serve as the perfect base for your Heavenly Tiramisu Layer Cake. Get ready to layer your cake with coffee syrup and creamy mascarpone frosting, and take your dessert to the next level!

Creating the Luxurious Mascarpone Filling
The mascarpone filling is the heart of the Heavenly Tiramisu Layer Cake, contributing to its signature creamy texture that contrasts beautifully with the coffee-soaked layers. This Italian cheese, with its rich and velvety characteristics, is what sets this dessert apart from other layered cakes.
Ingredients Breakdown
To create the perfect mascarpone filling, you will need the following ingredients:
– 16 ounces of mascarpone cheese: This creamy cheese is essential for that authentic tiramisu flavor.
– 1 cup of heavy cream: This will add lightness and volume to the filling.
– ½ cup of powdered sugar: Sweetens the mixture without adding graininess.
– 1 teaspoon of pure vanilla extract: Enhances the flavor profile and adds warmth.
Step-by-Step Guide to Whipping Cream and Folding into the Mascarpone Mixture
1. Prepare Your Mixing Bowl: Start by ensuring your mixing bowl and beaters are clean and dry. This helps in achieving better volume when whipping the cream.
2. Whip the Heavy Cream: In the mixing bowl, pour in the heavy cream. Using an electric mixer, beat on medium speed until soft peaks form. This usually takes about 2-3 minutes. Be careful not to over-whip, as you want a smooth, creamy texture.
3. Combine Mascarpone and Sugar: In a separate bowl, add the mascarpone cheese, powdered sugar, and vanilla extract. Mix these ingredients together using a spatula or a whisk until smooth and well combined.
4. Fold in the Whipped Cream: Gently fold the whipped cream into the mascarpone mixture using a spatula. Start by adding a scoop of whipped cream into the mascarpone to lighten it, then gradually fold in the rest. This technique ensures that you maintain the fluffiness of the cream.
5. Achieve the Perfect Consistency and Flavor Balance: The final mascarpone filling should be creamy, smooth, and hold its shape. Taste it to ensure the sweetness is balanced; feel free to adjust the sugar according to your preference.
Assembling the Heavenly Tiramisu Layer Cake
The assembly process is crucial in creating a visually stunning and delicious cake. Proper layering ensures that each slice showcases the beautiful contrast between the rich mascarpone filling and the coffee-infused layers.
Instructions on Leveling the Cake Layers and Applying the Coffee Syrup
1. Level the Cake Layers: Once the cake layers are completely cooled, use a serrated knife to level the tops of each layer, creating a flat surface. This step is essential for easy stacking and even layers.
2. Prepare the Coffee Syrup: If you haven’t already prepared your coffee syrup, brew a strong cup of coffee or espresso and mix it with a couple of tablespoons of coffee liqueur (if desired). Allow it to cool to room temperature.
3. Soak the Cake Layers: Place the first cake layer on your serving platter. Using a pastry brush, generously soak the top of the layer with the coffee syrup. This infuses the cake with a rich coffee flavor, enhancing the tiramisu experience.
Detailed Guide on Spreading the Mascarpone Filling Between Layers
1. Spread the Filling: Take approximately one-third of the mascarpone filling and spread it evenly over the soaked cake layer, leaving a small border along the edges to prevent overflow.
2. Layering: Carefully place the second cake layer on top and repeat the soaking process with coffee syrup. Spread another third of the mascarpone filling on this layer.
3. Continue the Process: Repeat the process with the remaining layers: soak, fill, and stack until all layers are assembled. Finish with the final layer of cake on top.
Suggestions for Ensuring Even Distribution and Maintaining Structural Integrity
– Use an offset spatula to help spread the filling evenly, ensuring a smooth and uniform layer.
– Make sure to apply enough pressure when stacking the layers to eliminate any gaps, but be gentle enough to avoid squishing the cake.
– If you notice any imbalance, adjust the layers slightly by gently pressing down or lifting them as needed.
Chilling and Serving the Cake
Chilling the cake is a vital step that allows the flavors to meld beautifully and the mascarpone filling to set, creating a more cohesive dessert experience.
Explanation of Why Chilling is Important
Chilling the cake not only helps the filling firm up but also allows the flavors to deepen and integrate. The coffee, mascarpone, and cake flavors all come together, creating a harmonious blend that is truly heavenly.
Recommended Chilling Time and What to Expect
For optimal results, chill the assembled cake in the refrigerator for at least 4 hours, although overnight is even better. This will ensure the cake slices nicely and allows the filling to set properly.
Final Touches: Dusting with Cocoa Powder and Optional Chocolate Shavings
Once chilled, carefully remove the cake from the refrigerator. Dust the top layer with unsweetened cocoa powder using a fine sieve for an elegant finish. If desired, you can also add chocolate shavings or curls on top for extra flair and a touch of luxury.
Presentation Tips for Serving the Cake Attractively
– Use a sharp knife to cut the cake into even slices. Clean the knife between cuts for neat edges.
– Serve the cake on a decorative cake stand or platter, garnishing with chocolate shavings, fresh mint leaves, or coffee beans for added visual appeal.
– Pair with a side of whipped cream or a scoop of vanilla ice cream for an extra indulgent treat.
Conclusion
The Heavenly Tiramisu Layer Cake is a grand celebration of flavors, texture, and presentation. With its rich, creamy mascarpone filling and layers of coffee-soaked cake, this dessert is perfect for any special occasion, from birthdays to holiday gatherings.
By following this detailed recipe, you can create a stunning dessert that will impress your guests and elevate your dining experience. The satisfaction of crafting this homemade layered cake is unmatched, and it serves as a beautiful centerpiece on any dessert table.
We encourage you to try making this Heavenly Tiramisu Layer Cake for your next celebration. The blend of flavors and the joy of sharing a dessert crafted from scratch will undoubtedly make your gathering memorable. Indulge in the delightful experience of creating and enjoying this exquisite cake, and let it become a cherished favorite in your recipe repertoire.

