Introduction
There’s something universally comforting about chocolate chip cookies. Whether it’s the warm, gooey center or the enticing aroma wafting through the kitchen as they bake, these delectable treats have a special place in the hearts (and stomachs) of many. For generations, chocolate chip cookies have been a staple in homes, serving as a delightful dessert after dinner or a sweet snack in the afternoon. However, if you’re looking for a more convenient and shareable version of this classic treat, then chewy chocolate chip cookie bars are your answer!
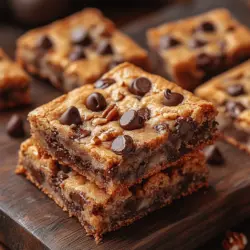
Cookie bars transform the beloved chocolate chip cookie into a simple, no-fuss dessert that’s perfect for gatherings, parties, or just a cozy night in. They are baked in a pan and cut into squares, which not only makes them easy to serve but also allows for a delightful chewy texture that many love. Imagine biting into a rich, chocolatey square that combines the best parts of cookies without the hassle of individual baking sheets.
In this article, we’ll explore the irresistible qualities of chewy chocolate chip cookie bars, their nostalgic roots, and how they can cater to both novice bakers and seasoned pros alike. With their rich flavor and chewy bite, these bars are sure to become a favorite in your household.
The Allure of Chewy Chocolate Chip Cookie Bars
The nostalgia associated with chocolate chip cookies is undeniable. Many of us have fond memories of baking alongside a parent or grandparent, measuring out flour, and eagerly waiting for the timer to ring. Chocolate chip cookies symbolize comfort, joy, and the warmth of home. Cookie bars take this beloved treat to the next level, offering a modern twist that fits perfectly into today’s fast-paced lifestyle.
One of the primary advantages of cookie bars is their convenience. Unlike traditional cookies, which require individual scooping and baking, cookie bars allow you to pour the batter into a single pan. This method not only saves time but also results in a delightful texture that is chewy and gooey throughout. Cookie bars are perfect for gatherings—whether it’s a birthday party, a bake sale, or a casual get-together with friends. You can easily cut them into squares and serve them to a crowd, making them a fantastic option for those who want to share a homemade treat without the hassle.
Moreover, the versatility of cookie bars is a major draw. While we’ll focus on the classic chocolate chip version, the beauty of cookie bars lies in their adaptability. You can customize them with various mix-ins, such as nuts, dried fruits, or even different types of chocolate. This means that you can cater to different tastes and preferences, ensuring that everyone leaves satisfied.
Essential Ingredients for Chewy Chocolate Chip Cookie Bars
To create the perfect chewy chocolate chip cookie bars, it’s essential to understand the role of each ingredient. Here’s a detailed breakdown of what you’ll need for this recipe:
Unsalted Butter
Using softened unsalted butter is crucial for achieving the right texture in your cookie bars. Softened butter allows for better incorporation with the sugars, creating a creamy mixture that leads to a chewy final product. Additionally, using unsalted butter gives you control over the salt content in your recipe.
Brown Sugar and Granulated Sugar
The combination of brown sugar and granulated sugar is key to achieving the perfect balance of chewiness and sweetness in your cookie bars. Brown sugar contains molasses, which adds moisture and a rich flavor, while granulated sugar contributes to the crispness of the outer layer. This pairing ensures that your cookie bars have a delightful texture and a sweet, satisfying taste.
Eggs
Eggs play a vital role in binding the ingredients together and adding moisture to the batter. They help create a cakey structure while also contributing to the chewiness that we all love in cookie bars. For best results, ensure your eggs are at room temperature before mixing them into your batter.
Vanilla Extract
A dash of vanilla extract enhances the overall flavor of your cookie bars, providing that quintessential sweet aroma that complements the chocolate. Opt for pure vanilla extract for the best quality and flavor impact.
All-Purpose Flour
All-purpose flour is the foundation of your cookie bars, providing the necessary structure. The right amount of flour is essential to ensure that your bars are neither too dense nor too crumbly. Make sure to measure accurately, as too much flour can lead to a dry texture.
Baking Powder and Baking Soda
These leavening agents work together to create the perfect rise and texture in your cookie bars. Baking powder adds lift, while baking soda helps with browning and enhances the cookie’s chewy texture. It’s important to use both for balanced results.
Salt
Salt is often an overlooked ingredient in baking, but it plays a crucial role in balancing sweetness. A pinch of salt enhances the chocolate flavor and brings out the richness of the cookie bars.
Chocolate Chips
The star of the show! You can choose between semi-sweet, milk chocolate, or even dark chocolate chips, depending on your preference. Each type of chocolate brings a unique flavor profile, so feel free to mix and match according to your taste. For an added twist, consider using chocolate chunks for a more decadent experience.
Optional Nuts
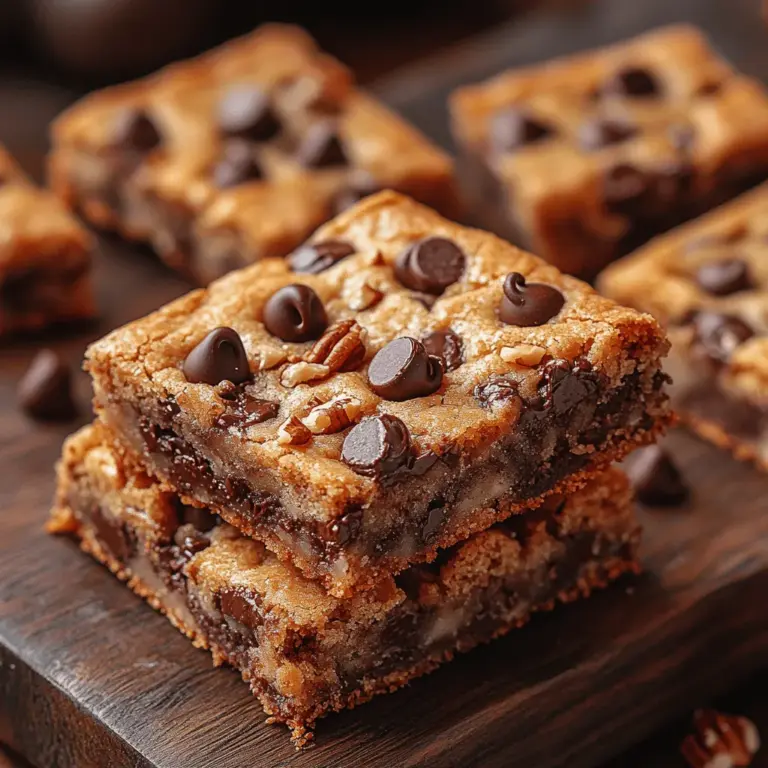
While chocolate chips are the primary focus, you can elevate your cookie bars by incorporating nuts. Chopped walnuts, pecans, or even macadamia nuts can add a delightful crunch and nutty flavor. Consider your audience—some may prefer nut-free options, while others may enjoy the added texture.
Step-by-Step Instructions for Perfect Cookie Bars
Before diving into the mixing process, it’s essential to preheat your oven to ensure that your cookie bars bake evenly and achieve that perfect chewy texture. Set your oven to 350°F (175°C) and allow it to heat thoroughly while you prepare your batter.
Preheat the Oven
Preheating the oven is a crucial step in baking, as it ensures that your cookie bars start cooking immediately when placed inside. This initial blast of heat helps create a nice, chewy interior while achieving a golden-brown exterior. Make sure your oven is fully preheated before you place your pan inside for the best results.
With the oven heating up, you’re now ready to begin mixing your ingredients and creating the delicious chewy chocolate chip cookie bars that will soon become a staple in your baking repertoire. Stay tuned for the following steps, where we’ll guide you through mixing the ingredients, preparing the pan, and baking your cookie bars to perfection.
Mixing Wet Ingredients
To achieve the perfect chewy chocolate chip cookie bars, the first step involves properly mixing your wet ingredients. This process usually begins with creaming together the butter and sugars. The creaming method is crucial to the texture of your cookie bars. It incorporates air into the mixture, which helps create a light and airy batter, essential for achieving the desired chewiness.
Start by using softened unsalted butter, which is typically around room temperature. Combine it with both brown sugar and granulated sugar in a large mixing bowl. Use an electric mixer on medium speed to beat the butter and sugars together until the mixture is light and fluffy—a process that usually takes about 2-3 minutes. This not only helps dissolve the sugars but also ensures that your cookie bars will rise properly during baking.
Once your butter and sugar are fully creamed, add in the eggs and vanilla extract. Continue to mix until these ingredients are well incorporated. The eggs add moisture and richness, while the vanilla enhances the overall flavor profile of the cookie bars. It’s important to mix just until combined; overmixing can lead to dense bars.
Combining Dry Ingredients
Next, it’s time to prepare the dry ingredients. In a separate bowl, whisk together all-purpose flour, baking soda, and salt. This step is important for two reasons: it ensures a uniform distribution of the leavening agent (baking soda) and salt throughout the flour and helps prevent any lumps from forming in your cookie bars.
Using a whisk is key here, as it aerates the flour and helps to break apart any clumps. Remember, lumps in dry ingredients can lead to uneven texture in your final product, so take this step seriously. Once thoroughly mixed, set the bowl aside to merge with the wet ingredients later.
Merging Wet and Dry Ingredients
When it comes to combining the wet and dry ingredients, technique is critical. Begin by pouring the dry ingredient mixture into the bowl containing the wet ingredients. Using a spatula or wooden spoon, gently fold the dry ingredients into the wet. The goal here is to mix until the flour is just incorporated—avoid vigorous stirring. Overmixing can develop the gluten in the flour, resulting in tough cookie bars instead of the desired chewy texture.
As you mix, you’ll notice the dough starts to come together. Scrape down the sides of the bowl to ensure that all the flour is fully integrated. Stop mixing as soon as you see no dry streaks of flour; it’s okay if the mixture looks a bit uneven at this stage.
Folding in Chocolate Chips and Nuts
Now it’s time to enhance your cookie bars with chocolate chips and nuts. This is where you can get creative. Use semi-sweet chocolate chips for a classic flavor, or opt for milk or dark chocolate depending on your preference. If you’re adding nuts, such as walnuts or pecans, this is the moment to fold them in as well.
Using a spatula, gently fold the chocolate chips and nuts into the dough. The technique of folding is important here as it helps maintain the airiness of the dough while ensuring that the add-ins are evenly distributed throughout. Be careful not to overmix; you want to keep that light texture intact.
Transferring to the Baking Pan
Once your dough is ready, it’s time to transfer it to a baking pan. Line a 9×13 inch baking pan with parchment paper, leaving some overhang on the sides for easy removal later. This step ensures that your cookie bars do not stick to the pan.
Using a spatula, scoop the dough into the prepared baking pan. Spread the dough evenly across the bottom using the back of the spatula. Make sure to press it down firmly but gently, as you want a uniform thickness across the pan. This is key to ensuring that the cookie bars bake evenly.
Baking
Preheat your oven to 350°F (175°C). Once your oven is ready, place the baking pan in the center of the oven. Bake for about 25-30 minutes, but keep an eye on them. The edges should turn a light golden brown while the center remains slightly soft.
To check for doneness, insert a toothpick in the center—if it comes out with a few moist crumbs, your cookie bars are ready. Remember, they’ll continue to cook slightly from residual heat even after you take them out of the oven, so it’s better to err on the side of underbaking than overbaking. The science behind this is simple: underbaked bars will develop the chewy texture that we crave, while overbaked bars can turn dry and crumbly.
Cooling and Slicing
Once baked, remove the cookie bars from the oven and allow them to cool in the pan on a wire rack for at least 15-20 minutes. Cooling is a crucial step; it allows the bars to set, which will enhance their texture. If you try to slice them too soon, they may fall apart.
After they have cooled sufficiently, use the parchment paper edges to lift the cookie bars out of the pan. Place them on the wire rack to cool completely before slicing into squares or rectangles. This will ensure that the bars maintain their shape and texture.
Serving Suggestions
Chewy chocolate chip cookie bars can be enjoyed in many delightful ways. For a warm treat, serve them straight out of the oven with a scoop of vanilla ice cream on top, creating a decadent dessert experience. Alternatively, enjoy them at room temperature for a classic cookie bar experience or chill them in the refrigerator for a refreshing twist.
For an extra touch, drizzle melted chocolate over the top or sprinkle a pinch of sea salt before serving. These cookie bars are perfect for parties, potlucks, or simply as a sweet snack to enjoy with your morning coffee.
The Science Behind the Texture of Chewy Cookie Bars
Understanding the science behind your cookie bars can help you perfect the recipe. The ingredient ratios play a significant role in determining the chewiness and softness of the bars. For instance, using more brown sugar than granulated sugar not only enhances the flavor with its caramel notes but also contributes to a chewier texture due to its higher moisture content.
The Maillard reaction is another critical factor at play. This chemical reaction occurs between amino acids and reducing sugars when the cookie bars are heated, resulting in the browning and complex flavors that we love in baked goods. This process is responsible for the deep, rich taste of your cookie bars.
Finally, the cooling time is essential in developing the texture. Allowing the bars to cool completely before slicing helps them firm up and enhances that chewy bite we all crave.
Creative Variations and Customizations
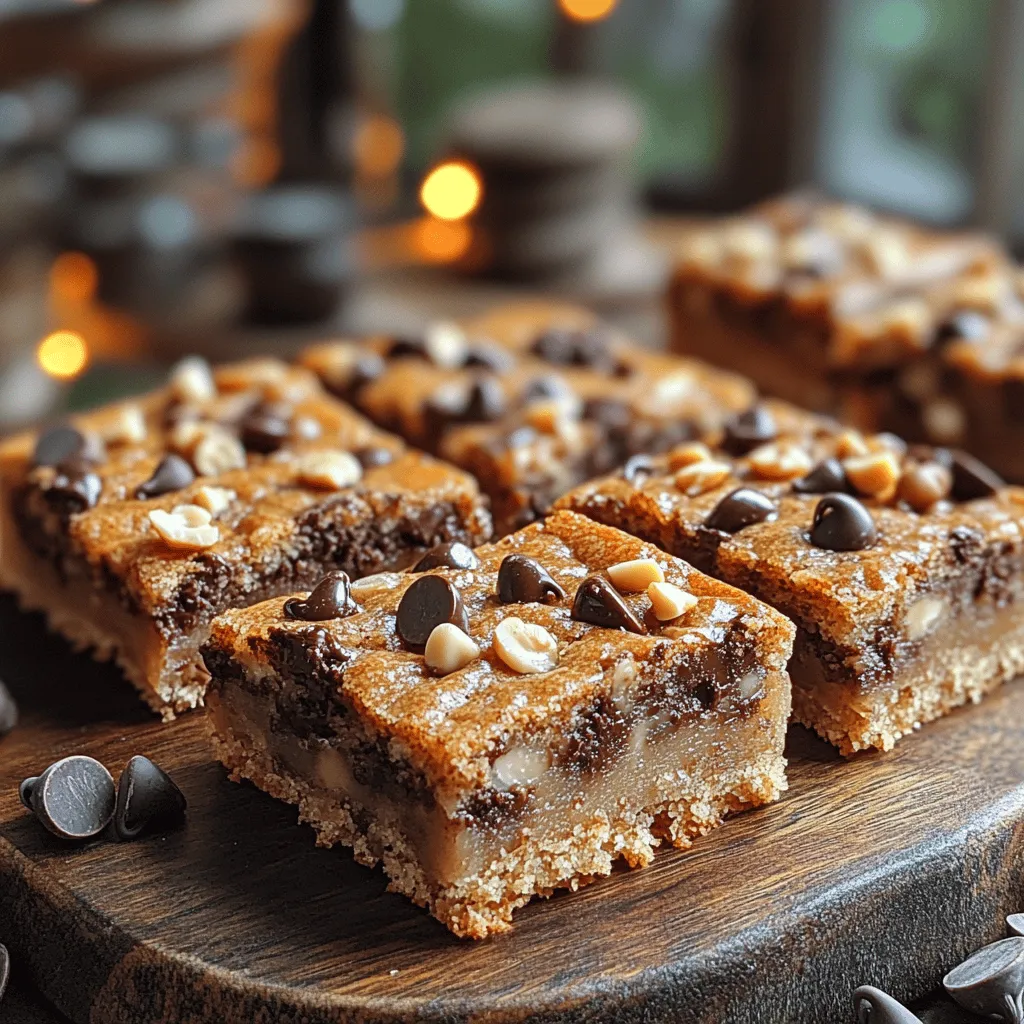
One of the joys of baking cookie bars is the ability to customize them to your taste. Consider adding spices like cinnamon or nutmeg for a warm, aromatic flavor. You could also experiment with different types of chocolate—white chocolate, dark chocolate, or even mint chocolate chips can all create unique variations.
Beyond chocolate, think about other mix-ins. Dried fruits like cranberries or apricots can add a chewy texture and a tangy flavor contrast. Unsweetened shredded coconut can introduce a tropical twist, while colorful candy pieces can make for a fun, festive treat.
For those with dietary restrictions, there are plenty of substitutions to consider. You can make these bars gluten-free by using a gluten-free flour blend. If you’re looking for vegan options, substitute the butter with coconut oil or vegan butter, and use flax eggs in place of regular eggs.
Storing and Preserving Cookie Bars
To maintain the freshness of your chewy chocolate chip cookie bars, store them in an airtight container at room temperature. They typically last about a week, although you’ll likely find them gone before then!
For longer preservation, consider freezing your cookie bars. Cut them into squares and wrap them individually in plastic wrap, then place them in a freezer-safe container. When you’re ready to enjoy, simply thaw them at room temperature for a few hours or pop them in the microwave for a few seconds to warm them up.
Conclusion
Chewy chocolate chip cookie bars embody the delightful simplicity and versatility of homemade treats. Their chewy texture, rich flavor, and endless customization options make them a staple in any baking repertoire. Whether enjoyed warm, at room temperature, or chilled, these bars are sure to please.
We encourage you to try this recipe and experiment with your own variations, discovering new flavors and textures that cater to your personal preferences. Baking is not just about creating delicious treats; it’s also about sharing joy with family and friends. So gather your loved ones around, whip up a batch of these cookie bars, and enjoy the communal experience that comes with baking together.