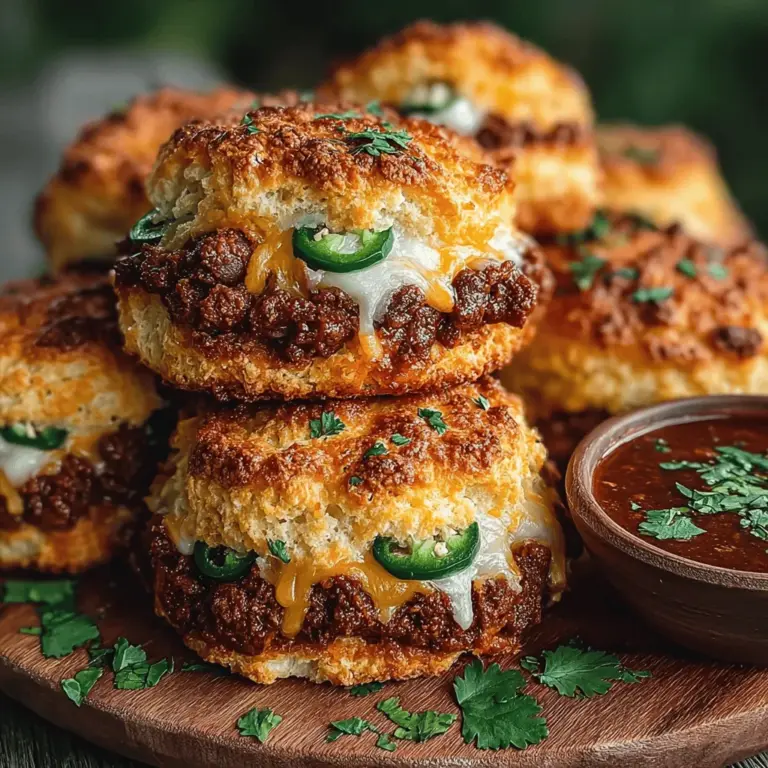
Cheddar Chili Biscuit Sliders: A Flavorful Fusion for Any Occasion
Cheddar Chili Biscuit Sliders are an irresistible fusion of comforting flavors and textures, making them the perfect choice for game-day gatherings, family dinners, or casual get-togethers. Imagine biting into a buttery, flaky biscuit that cradles a zesty chili filling, combining savory notes with a hint of spice. This scrumptious treat not only satisfies hungry appetites but is also surprisingly easy to make, revealing delightful layers of flavor with every bite. In this article, we will guide you through the entire process of crafting these delectable sliders, from making the perfect biscuits to assembling the final dish. Let’s dive into the world of flavors and aromas that will tantalize your taste buds and impress your guests.
Understanding the Ingredients
Before we embark on the journey of creating Cheddar Chili Biscuit Sliders, it’s essential to understand the key components that contribute to their deliciousness. The sliders consist of two main parts: the biscuit base and the chili filling. Each ingredient plays a crucial role in enhancing the overall flavor and texture of the dish, so let’s break them down.
Overview of Biscuit Ingredients
The biscuit base is the cornerstone of this recipe. Here are the essential ingredients you’ll need:
– All-Purpose Flour: This forms the structure of the biscuits. It provides the necessary gluten to give the biscuits their shape and texture.
– Baking Powder and Baking Soda: These leavening agents help the biscuits rise, creating that light and fluffy texture we all love.
– Salt: A necessary component that enhances the flavors of the biscuits.
– Cayenne Pepper: This adds a subtle kick to the biscuits, complementing the chili filling perfectly.
– Unsalted Butter: Key for achieving that rich, buttery flavor and flaky texture. It’s important to use cold butter for the best results.
– Cheddar Cheese: This ingredient brings a sharpness and creaminess that pairs exquisitely with the other flavors.
– Buttermilk: This not only contributes moisture but also adds a slight tang, enhancing the overall taste of the biscuits.
Breakdown of Chili Filling Ingredients
The chili filling complements the biscuits beautifully. Here’s what you’ll need:
– Ground Beef (or Turkey): The main protein source that provides heartiness to the filling.
– Onion and Garlic: Aromatic vegetables that lay the foundation for flavor in the chili.
– Kidney Beans: These add texture and a dose of fiber, making the filling more satiating.
– Diced Tomatoes: They introduce moisture and acidity, balancing the richness of the meat.
– Chili Powder, Cumin, and Paprika: A blend of spices that delivers warmth and depth to the chili.
– Salt and Pepper: Essential for seasoning and enhancing all the flavors.
Importance of Ingredient Quality
Using high-quality ingredients is paramount when it comes to crafting Cheddar Chili Biscuit Sliders. Opt for fresh vegetables, premium ground meats, and sharp cheddar cheese to elevate the flavors of your dish. The quality of your spices can also make a significant difference; consider sourcing them from a reputable supplier to ensure maximum freshness and potency. Investing in quality ingredients not only enhances the taste but also contributes to a more satisfying culinary experience.
Preparing the Biscuits
Now that we understand the ingredients, it’s time to dive into the process of making the biscuit base. Creating the perfect biscuit requires attention to detail and a few key techniques that ensure a flaky and tender result.
Step-by-Step Instructions for Mixing Dry Ingredients
Start by gathering your dry ingredients in a large mixing bowl. Combine the all-purpose flour, baking powder, baking soda, salt, and cayenne pepper. Whisk them together until well blended. This step is crucial as it ensures even distribution of the leavening agents and spices, leading to a uniform texture in your biscuits.
Techniques for Incorporating Butter
Next, it’s time to add the cold unsalted butter. Cut the butter into small cubes and add it to the flour mixture. Using a pastry cutter or your fingertips, work the butter into the dry ingredients. The goal is to incorporate the butter until the mixture resembles coarse crumbs with pea-sized pieces of butter still visible. This method is key to achieving that coveted flaky texture in your biscuits. Remember, the colder the butter, the flakier the biscuits will be.
The Role of Buttermilk in Biscuit-Making
Once the butter is properly incorporated, it’s time to add the buttermilk. Make a well in the center of your dry mixture and pour in the buttermilk. Using a fork, gently mix until the dough just comes together. Buttermilk is essential not just for moisture; it also reacts with the baking soda to create a tender crumb and adds a delightful tanginess that enhances the flavor of the biscuits.
Tips for Handling the Dough
When it comes to biscuit dough, less is more. Overworking the dough can lead to tough biscuits, so handle it gently. Once the dough has come together, turn it out onto a lightly floured surface. Use your hands to gently pat the dough into a rectangle about one inch thick. If you find that the dough is sticking, sprinkle a bit more flour on your work surface and on top of the dough as needed.
Shaping and Baking the Biscuits
With your biscuit dough ready, it’s time to shape and bake those delicious morsels.
Techniques for Rolling and Cutting the Biscuit Dough
Using a rolling pin, roll the dough out to about ¾ inch thick. Then, use a biscuit cutter or a round glass to cut out your biscuits. Place each biscuit onto a baking sheet lined with parchment paper, ensuring that they are close but not touching each other. This will allow them to rise beautifully in the oven.
Importance of Keeping the Dough Cold
One of the keys to achieving flaky biscuits is to keep the dough cold before baking. If you have time, pop the cut biscuits into the refrigerator for about 15 minutes before baking. This helps the butter firm up again, which contributes to the flakiness of the finished product.
Baking Tips
Bake your biscuits in a preheated oven at 425°F (220°C) for about 12-15 minutes, or until they are golden brown on top. To check for doneness, look for a golden color and a firm texture. The biscuits should be slightly firm to the touch but will still be soft and tender inside.
Visual Cues for Perfect Biscuit Doneness
When your biscuits are done baking, they should be beautifully golden brown and have risen nicely. You can also gently tap on the bottom of a biscuit; if it sounds hollow, it’s a good indication that they are fully baked. Allow the biscuits to cool slightly on a wire rack before assembling your sliders.
As we move forward, we will explore how to prepare the chili filling that will complement these delightful biscuits perfectly. Stay tuned for the next steps in creating your Cheddar Chili Biscuit Sliders!
Crafting the Chili Filling
Creating the perfect chili filling is essential for your Cheddar Chili Biscuit Sliders. With the right techniques and spices, your chili will not only be hearty but bursting with flavor.
Cooking the Ground Meat: Tips for Achieving the Perfect Browning
Start by selecting your choice of ground meat. Beef, turkey, or even plant-based alternatives can work well. For optimal browning, use a cast-iron skillet or a heavy-bottomed pan. Preheat the pan over medium-high heat and add a splash of oil to prevent sticking.
– Tip: Do not overcrowd the pan. If necessary, cook the meat in batches to ensure even browning. Allow the meat to sit undisturbed for a few minutes before stirring, which promotes a rich, brown crust that enhances the flavor of the chili.
The Importance of Aromatics: How Onions and Garlic Enhance the Chili’s Flavor Profile
Once the meat is browned, add diced onions and minced garlic to the pan. These aromatics are crucial for building a deep flavor base.
– Tip: Sauté the onions until they become translucent and fragrant, about 5 minutes. Then, add the garlic and cook for an additional minute, ensuring it does not burn. The combination of these two ingredients will create a robust foundation for your chili.
Integrating Spices: The Balance of Chili Powder, Cumin, and Paprika for a Well-Rounded Taste
Now comes the fun part: integrating the spices. A well-rounded chili benefits from a blend of chili powder, cumin, and paprika.
– Spice Proportions: Use 2 tablespoons of chili powder, 1 teaspoon of cumin, and 1 teaspoon of smoked paprika. This balance creates a complex flavor profile that provides heat without overwhelming the palate.
Add the spices after the onions and garlic have cooked down. Stir to toast the spices for about 30 seconds before adding the rest of the ingredients, allowing their flavors to bloom.
How to Incorporate Beans and Tomatoes for Texture and Heartiness in the Chili
For a hearty chili, include canned beans and tomatoes. Use a can of kidney or black beans, rinsed and drained, and a can of diced tomatoes (with juices) to add texture and richness.
– Tip: Stir in the beans and tomatoes after the spices have been toasted. Bring the mixture to a simmer and let it cook for at least 15 minutes to meld the flavors. You can adjust the thickness by adding a bit of water or broth if necessary.
Assembling the Sliders
With your chili filling ready, it’s time to assemble your Cheddar Chili Biscuit Sliders. This step is straightforward but requires some techniques to ensure a delightful presentation.
Techniques for Slicing and Preparing the Biscuits for Assembly
Start by baking your cheddar biscuits according to your preferred recipe or using store-bought biscuits for convenience. Once they are golden and flaky, allow the biscuits to cool slightly before slicing them in half horizontally.
– Tip: Use a serrated knife to cut the biscuits cleanly, preserving their texture. If you want to elevate the flavor, consider toasting the cut sides lightly in a skillet with a bit of butter.
Tips for Layering the Chili and Toppings Effectively
To assemble the sliders, spoon a generous amount of chili onto the bottom half of each biscuit. Be careful not to overfill, as this can lead to messy sliders.
– Layering: After adding the chili, sprinkle shredded cheese on top, allowing it to melt slightly from the warmth of the chili. Cap each slider with the biscuit top.
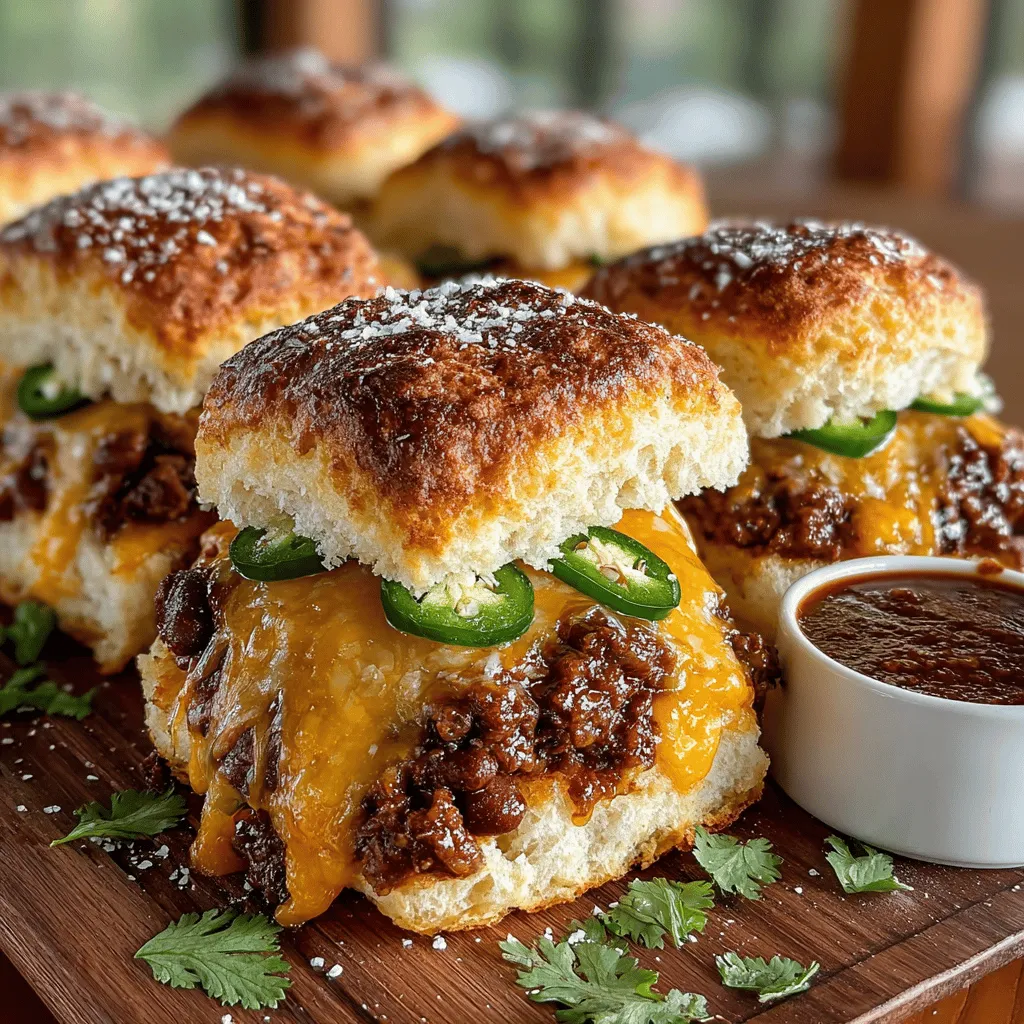
Suggestions for Optional Toppings: Pickles, Jalapeños, and Fresh Herbs
To elevate your sliders, consider adding optional toppings such as sliced pickles, jalapeños for an extra kick, or fresh herbs like cilantro or green onions for brightness.
– Presentation Tip: Arrange toppings on the side so guests can customize their sliders according to their preferences. This adds an interactive element to the dining experience.
Presentation Ideas for an Appealing Slider Display
When it comes to serving, presentation matters. Arrange the assembled sliders on a large platter or wooden board. You can also use small skewers to hold the sliders together, making them easy to grab.
– Garnish: Add a sprinkle of fresh herbs or a drizzle of hot sauce over the sliders for an eye-catching finish. Serve with small bowls of extra toppings on the side for a beautiful and inviting display.
Serving Suggestions
Enhancing the dining experience goes beyond just the food itself. Here are some ideal pairings and serving styles for your Cheddar Chili Biscuit Sliders.
Ideal Pairings for Cheddar Chili Biscuit Sliders
When it comes to beverages, consider serving your sliders with craft beer, which complements the richness of the chili. An amber ale or a light lager can balance the heat nicely. If you prefer non-alcoholic options, refreshing iced tea or homemade lemonade can be delightful.
Side Dish Recommendations: Fresh Salads, Chips, or a Simple Vegetable Platter
For sides, fresh salads can provide a crisp contrast to the hearty sliders. A simple green salad with a tangy vinaigrette or a corn and avocado salad can enhance the meal beautifully. Alternatively, serving tortilla chips with salsa or guacamole can add a fun, casual vibe.
Ideas for Serving the Sliders at Gatherings: Buffet Style or Plated Servings
Consider your gathering style when serving the sliders. For a casual get-together, a buffet style allows guests to build their sliders as they wish. Set up a slider station with biscuits, chili, and toppings for a fun, interactive meal.
For more formal occasions, you can plate the sliders individually as appetizers, accompanied by small servings of sides for an elegant touch.
Conclusion
Cheddar Chili Biscuit Sliders are not just a meal; they are an experience that brings comfort and joy to any occasion. With their flaky biscuit exterior and savory chili filling, these sliders are sure to satisfy cravings and spark conversations. Whether you’re hosting a party or simply looking for a hearty dish to enjoy with family, this recipe will deliver delicious results.
Embrace the flavors and warmth of this dish, and let it become a staple in your culinary repertoire. With easy-to-follow steps, creative serving suggestions, and the ability to customize each slider to your liking, your Cheddar Chili Biscuit Sliders will undoubtedly become a favorite at any gathering. So gather your ingredients, roll up your sleeves, and get ready to enjoy a delightful culinary adventure!
