Delightful No-Bake Banana Pudding Cups
As the temperatures rise and summer days beckon, the allure of no-bake desserts becomes increasingly irresistible. There’s something uniquely satisfying about indulging in a sweet treat that requires no oven, allowing you to keep your kitchen cool while still creating something delicious. Enter the Delightful No-Bake Banana Pudding Cups—a simple yet elegant dessert that perfectly marries the natural sweetness of ripe bananas with the creamy goodness of pudding and the satisfying crunch of vanilla wafers. Whether you’re hosting a backyard barbecue, planning a family dinner, or simply treating yourself to something special, these banana pudding cups are sure to impress.
This delightful dessert is not only easy to prepare but also evokes a sense of nostalgia, reminiscent of childhood gatherings and the comforting flavors of homemade banana pudding. With each spoonful, you’ll enjoy the harmonious combination of textures—the smooth, velvety pudding, the tender banana slices, and the crunchy wafers that provide a perfect contrast. Best of all, this recipe allows you to whip up a batch of treats in no time, making it an ideal choice for those warm days when you crave something sweet but don’t want to crank up the oven.
Understanding the Ingredients for No-Bake Banana Pudding Cups
To create these delightful banana pudding cups, you’ll need a handful of key ingredients that come together to form a deliciously creamy and satisfying dessert. Each component plays a crucial role in achieving the perfect flavor and texture.
– Ripe Bananas: The star of the show is undoubtedly the bananas. Using ripe bananas is essential for optimal sweetness and flavor. When bananas are perfectly ripe, they develop a rich, caramel-like sweetness that enhances the overall taste of the pudding. Look for bananas that are slightly speckled with brown spots—this is a sign that they are at their peak for dessert-making.
– Instant Vanilla Pudding Mix: This ingredient is a game-changer in simplifying the dessert preparation process. Instant vanilla pudding mix allows you to achieve a rich, creamy texture without the need for extensive cooking. Just whisk it together with cold milk, and you’ll have a luscious pudding ready to layer into your cups.
– Cold Milk: The role of cold milk is pivotal in creating a smooth pudding consistency. Chilling the milk beforehand helps the pudding set properly and contributes to the overall creaminess of the dessert. For best results, use whole milk for a richer taste, but you can opt for lower-fat milk if you prefer a lighter version.
– Heavy Whipping Cream: Incorporating heavy whipping cream into the recipe adds a luxurious lightness and richness to the pudding. When whipped to soft peaks, the cream creates an airy texture that elevates the dessert, making each bite feel indulgent.
– Vanilla Extract: A splash of vanilla extract enhances the overall flavor profile of the pudding. It adds a warm, aromatic note that complements the sweetness of the bananas and the creaminess of the pudding, rounding out the dessert beautifully.
– Crushed Vanilla Wafers: These classic cookies provide a delightful crunch that balances the creaminess of the pudding. Layering crushed vanilla wafers in between the pudding and banana slices adds texture and flavor, making each spoonful a perfect blend of soft and crunchy.
– Ground Cinnamon and Fresh Mint: While optional, these ingredients can elevate the dessert further. A sprinkle of ground cinnamon introduces a warm spice that pairs wonderfully with bananas, while fresh mint leaves add a pop of color and a refreshing contrast.
Step-by-Step Instructions for Preparation
Now that we’ve covered the essential ingredients, let’s dive into the preparation of these delightful no-bake banana pudding cups. The process is straightforward and allows you to create a visually appealing dessert that is as enjoyable to make as it is to eat.
Preparing the Pudding: Begin by gathering your instant vanilla pudding mix and cold milk. In a mixing bowl, combine the pudding mix with the cold milk and use a whisk to mix them together thoroughly. It’s important to whisk vigorously to eliminate any lumps and ensure a smooth consistency. Keep whisking until the mixture thickens, which typically takes about two minutes. Once thickened, set the pudding aside to allow it to fully set while you prepare the whipped cream.
Whipping the Cream: In a separate mixing bowl, pour in the heavy whipping cream. Using an electric mixer, beat the cream on medium speed until soft peaks form. This means that when you lift the beaters out of the cream, the peaks should gently fall over. Be careful not to over-whip, as this can turn the cream grainy. The goal is to achieve a light and airy texture that will enhance the overall dessert.
Combining Mixtures: Once you have your whipped cream ready, it’s time to combine it with the prepared vanilla pudding. Using a spatula, gently fold the whipped cream into the pudding mixture. Folding is a crucial technique here; it helps maintain the light and airy texture of the whipped cream while incorporating it into the denser pudding. Be patient and continue folding until the two mixtures are fully combined and you achieve a smooth, creamy blend.
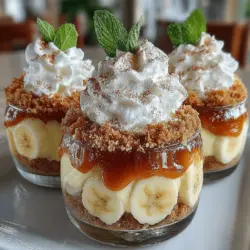
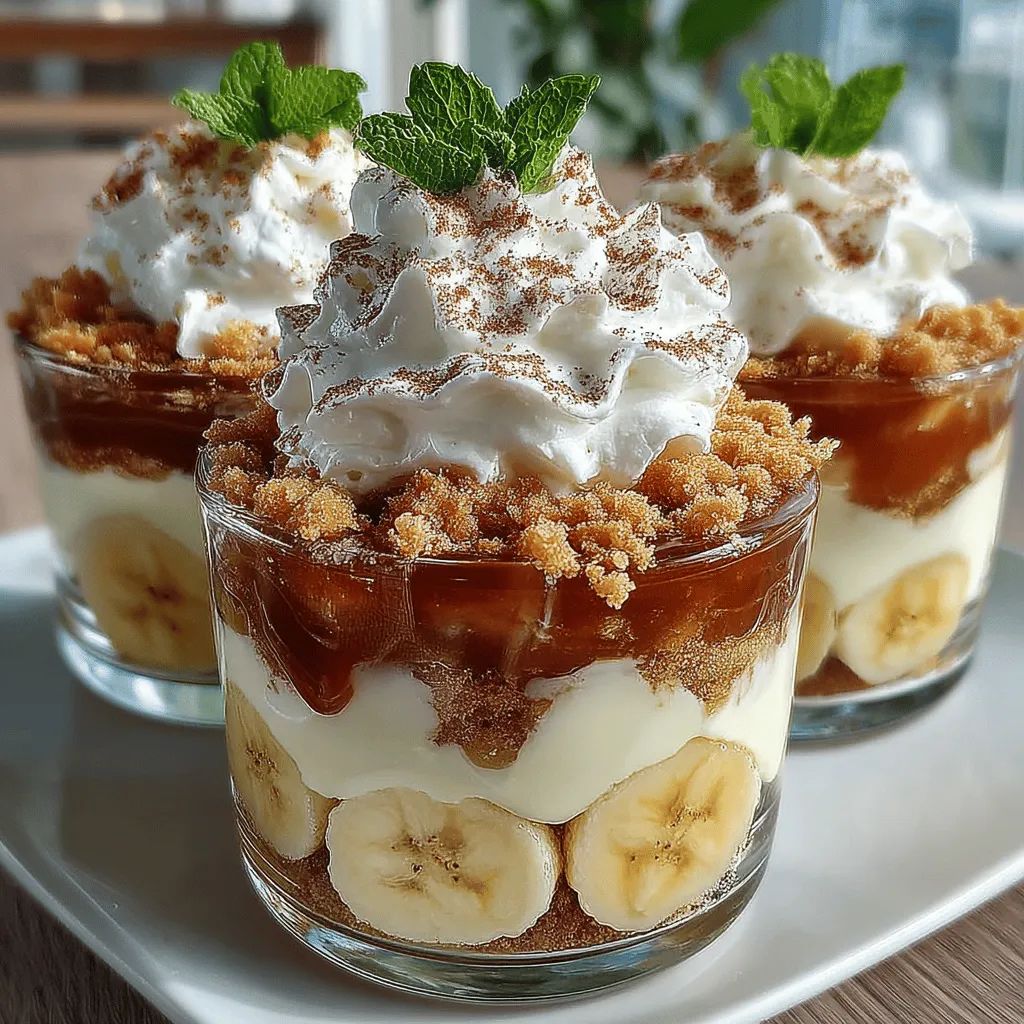
Layering the Cups: Now comes the fun part—assembling your banana pudding cups! Start by choosing your serving cups; clear glass cups or jars work beautifully to showcase the layers. Begin with a layer of crushed vanilla wafers at the bottom of each cup. Next, add a layer of the creamy pudding mixture, followed by a layer of sliced ripe bananas. Repeat this layering process until you reach the top of the cups, finishing with a layer of pudding. For an extra touch, you can sprinkle some crushed wafers on top or garnish with a sprig of fresh mint for added visual appeal.
These Delightful No-Bake Banana Pudding Cups are not just a treat for the taste buds; they are a feast for the eyes as well. With vibrant layers of banana, creamy pudding, and crunchy wafers, each cup is a miniature masterpiece that will leave everyone craving more. As you prepare to serve these delightful treats, get ready for compliments and satisfied smiles all around—this recipe is sure to become a favorite in your dessert repertoire.
Chilling the Dessert
Chilling is a crucial step in the preparation of your delightful no-bake banana pudding cups. Not only does it enhance the overall flavor of the dessert, but it also plays a significant role in achieving the perfect texture. When the pudding is allowed to chill in the refrigerator for at least two hours, the flavors meld beautifully, creating a harmonious balance between the sweet vanilla pudding, fresh bananas, and the crunchy layers of cookies.
This chilling time allows the cookies to soften slightly while still retaining a bit of their texture, creating a delightful contrast in every spoonful. Furthermore, the cooling process sets the pudding, giving it a creamy and thick consistency that is both satisfying and indulgent. If you can resist the temptation to dive in immediately, letting the dessert chill overnight will yield even better results, as the flavors will deepen and the overall taste will be more pronounced.
Serving Suggestions for No-Bake Banana Pudding Cups
When it comes to serving your no-bake banana pudding cups, the presentation can elevate the overall experience. Here are several creative ideas to enhance your pudding cups:
Garnishing Options
Garnishing your dessert not only adds visual appeal but can also introduce additional flavor notes. A simple sprinkle of ground cinnamon on top can bring a warm, aromatic quality that complements the sweetness of the bananas and pudding. Alternatively, adding a fresh mint leaf as a garnish not only adds a pop of color but also a refreshing hint that can brighten the dish. You might also consider drizzling a bit of chocolate syrup or caramel sauce over the top for an extra indulgent touch.
Serving Size and Portions
For gatherings and parties, portion sizes can greatly affect how the dessert is received. The delightful no-bake banana pudding cups can be served in individual clear cups or small jars, allowing each guest to enjoy their very own portion. Aim for a serving size of about 1/2 cup to 3/4 cup per person. This size is ideal for pairing with other desserts or snacks without overwhelming guests. If you’re expecting a larger crowd, consider doubling or tripling the recipe. These cups are easily scalable, and having extra on hand is always a good idea!
Pairing Ideas
To complement your no-bake banana pudding cups, consider serving them with beverages that enhance the flavors of the dessert. A classic option is a tall glass of cold milk, which pairs beautifully with the creaminess of the pudding. For a more adult twist, a light sparkling wine or a refreshing iced tea can provide a delightful contrast. If you’re looking to serve this dessert after a meal, consider pairing it with a light fruit salad or a cheese platter that includes soft cheeses, which can balance the sweetness of the pudding.
Nutritional Information and Dietary Considerations
Understanding the nutritional aspects of your dessert can help you make informed choices while enjoying this delightful treat.
Caloric Breakdown
Each serving of no-bake banana pudding cups typically contains around 200-250 calories, depending on the exact ingredients used and portion sizes. This dessert is a good source of carbohydrates from the bananas and cookies, as well as a moderate amount of fats from the creamy pudding mixture. Additionally, you’ll find essential nutrients such as potassium from the bananas and calcium from the pudding base, especially if you use whole milk or a fortified non-dairy milk.
Dietary Adaptations
This no-bake banana pudding recipe is versatile and can be easily adapted to meet various dietary needs. For those who are lactose intolerant or looking for a dairy-free option, substitute regular milk with almond milk or coconut milk, and use dairy-free pudding mix if available. You can also replace the standard cookies with gluten-free alternatives to make the dessert gluten-free.
For a lower-sugar option, consider using a sugar substitute in the pudding mix and selecting sugar-free cookies. These adaptations allow everyone to enjoy this delicious dessert without compromising on taste or dietary restrictions.
The Joy of No-Bake Desserts: Why This Recipe Stands Out
No-bake desserts are a favorite among many for several reasons, and this delightful banana pudding recipe exemplifies those benefits perfectly.
Ease of Preparation
One of the most appealing aspects of no-bake desserts is their simplicity. This recipe requires minimal cooking skills and can be prepared in less than 30 minutes. With just a few simple steps, even novice bakers can create an impressive dessert that looks and tastes like it took hours to prepare. The convenience of not needing to heat the oven also makes it a great choice during hot summer months when turning on the oven can be unappealing.
Flavor and Texture Harmony
The combination of creamy pudding, fresh bananas, and crunchy cookies creates a delightful balance of flavors and textures that is hard to resist. Each bite offers a satisfying mix of smooth and creamy pudding, soft and sweet bananas, and the satisfying crunch of the cookies. This harmony is what makes the dessert particularly enjoyable, as it appeals to a wide range of tastes and preferences.
Versatility
Another standout feature of this recipe is its versatility. While bananas are the star ingredient, you can easily customize this dessert by incorporating other fruits such as strawberries, blueberries, or peaches to create a seasonal variation. You can also experiment with different flavors of pudding, such as chocolate or butterscotch, to create a unique twist on the classic banana pudding. This adaptability makes it easy to cater to personal preferences and seasonal ingredients, ensuring that the dessert never feels repetitive.
Conclusion: The Perfect Treat for Any Occasion
In summary, the delightful no-bake banana pudding cups are not just a dessert; they are an experience filled with joy and satisfaction. This easy-to-prepare treat is perfect for any occasion, whether you’re hosting a summer barbecue, celebrating a birthday, or simply looking for a comforting dessert after dinner.
With their creamy, fruity, and crunchy layers, these pudding cups are sure to impress family and friends alike. Their ability to be customized and adapted for various dietary needs only adds to their charm. So why not give this recipe a try? Experience the joy of creating a dessert that is guaranteed to be a crowd-pleaser, and savor the delightful flavors that make these no-bake banana pudding cups a true treat for the senses.