Introduction
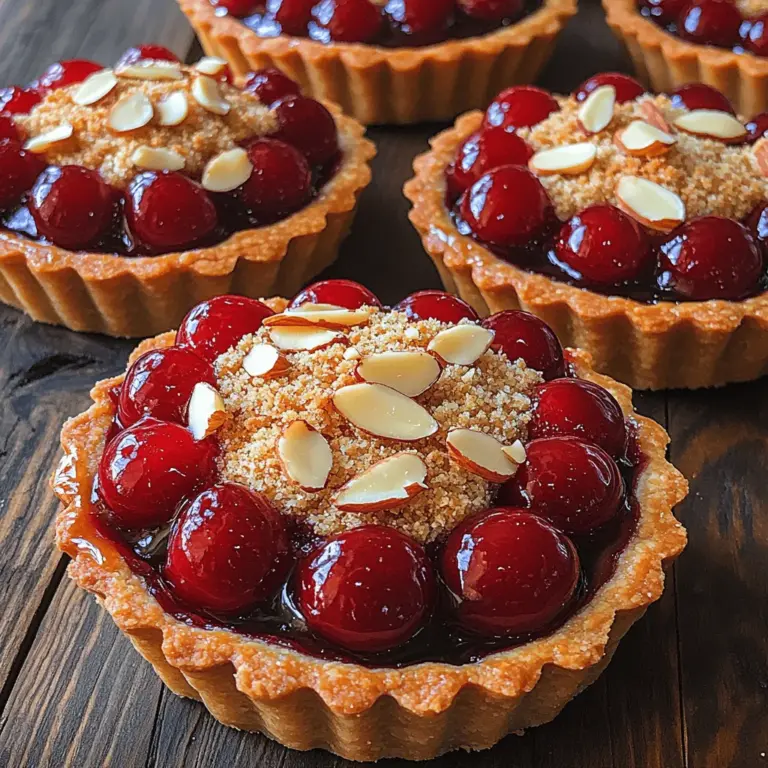
If you’re on the hunt for a dessert that elegantly combines sweet and tart flavors while showcasing the beauty of seasonal fruits, look no further than Sweet Cherry Bliss Tarts. These delightful pastries are a perfect choice for gatherings, summer picnics, or simply as a treat to enjoy with your afternoon tea. With their crisp, buttery crusts and luscious cherry filling, they capture the essence of indulgence in every bite.
What makes Sweet Cherry Bliss Tarts so appealing is their versatility. You can use fresh cherries when they are in season, allowing you to take advantage of their vibrant flavor and juicy texture. Alternatively, if cherries are out of season or you want a quicker option, canned cherry pie filling can be a convenient substitute that still delivers on taste. This adaptability means you can enjoy these tarts year-round, making them a staple in your dessert repertoire.
In this article, we will walk you through every step of making these tarts, from understanding the essential ingredients to preparing the crust and filling. Let’s dive in!
Understanding the Ingredients
Before embarking on your baking adventure, it’s crucial to understand the ingredients that make up Sweet Cherry Bliss Tarts. Each component plays a significant role in achieving the perfect balance of flavor and texture.
Tart Crust Ingredients
The base of any great tart is its crust, and for Sweet Cherry Bliss Tarts, we use a simple yet flavorful combination of all-purpose flour, chilled butter, sugar, and egg yolk.
– All-Purpose Flour: This is the foundation of the crust, providing structure. The protein content in all-purpose flour gives the crust its strength, allowing it to hold up against the juicy filling.
– Chilled Butter: The importance of chilled butter in tart crust cannot be overstated. Cold butter helps create a flaky texture, as it remains solid during the mixing process and creates pockets of air in the dough. When baked, these pockets expand, resulting in a light and delicate crust.
– Sugar: A bit of sugar is added for sweetness, balancing the tartness of the cherries. It also contributes to the browning of the crust, giving it a golden hue.
– Egg Yolk: The inclusion of egg yolk binds the crust together while adding richness. It enhances the flavor and helps create a tender texture.
Cherry Filling Components
The filling is undoubtedly the star of the show in Sweet Cherry Bliss Tarts. Here’s a breakdown of the key ingredients:
– Fresh Cherries or Canned Cherry Pie Filling: Using fresh cherries offers a burst of flavor and a satisfying texture. They can be pitted and halved for the tarts. On the other hand, canned cherry pie filling is a great time-saver and provides consistent sweetness, making it an excellent alternative.
– Sugar: Additional sugar in the filling enhances the cherries’ natural sweetness, balancing out their tanginess.
– Cornstarch: This thickening agent is crucial for creating a cohesive filling. It absorbs the juices released by the cherries during baking, preventing the tarts from becoming soggy and ensuring a delightful bite.
Almond Topping Ingredients
To elevate the Sweet Cherry Bliss Tarts, we’ll add a delicious almond topping, which not only adds flavor but also provides a beautiful finish.
– Almond Flour: This ingredient gives the topping a unique texture and nuttiness. Almond flour is finer and has a different flavor profile compared to regular flour, making it a fantastic addition to desserts.
– Almond Extract: Just a hint of almond extract enhances the overall flavor of the tarts. It adds depth and complements the cherries beautifully, creating a harmonious blend of flavors.
Step-by-Step Guide to Making Sweet Cherry Bliss Tarts
Now that we have a good understanding of the ingredients, it’s time to roll up our sleeves and start baking! Below is a comprehensive step-by-step guide to making Sweet Cherry Bliss Tarts.
Preparing the Tart Crust
1. Mixing the Ingredients: In a large mixing bowl, combine the all-purpose flour and sugar. Add the chilled butter, cutting it into the flour mixture using a pastry cutter or your fingertips until the mixture resembles coarse crumbs. The key is to ensure the butter remains cold throughout this process.
2. Incorporating the Egg Yolk: Next, create a well in the center of the flour mixture and add the egg yolk. Mix gently until the dough starts to come together. If the dough seems too dry, you can add a teaspoon of cold water at a time until it achieves the right consistency.
3. Chilling the Dough: Once the dough is formed, shape it into a disk, wrap it in plastic wrap, and refrigerate for at least 30 minutes. Chilling the dough is essential as it allows the gluten to relax, resulting in a tender crust once baked.
Preheating the Oven
While the dough chills, it’s a good time to preheat your oven. Set it to 375°F (190°C). Preheating is crucial because it ensures that the tarts bake evenly and achieve a beautiful golden crust.
Making the Cherry Filling
1. Macerating the Cherries: If you’re using fresh cherries, start by pitting and halving them. Place the cherries in a medium bowl and sprinkle with sugar and cornstarch. Gently toss them together and let the mixture sit for about 15 minutes. This maceration process allows the cherries to release their juices, which will enhance the flavor and create a syrupy filling.
Rolling Out the Tart Crust
1. Rolling the Dough: After the dough has chilled, remove it from the refrigerator. On a lightly floured surface, roll out the dough to about 1/8-inch thickness. Be sure to turn the dough occasionally to prevent sticking, and add flour as necessary.
2. Cutting Shapes: Use a round cutter or a tart pan to cut out circles of dough. If you’re using a tart pan, carefully press the dough into the pan, ensuring it fits snugly. Trim any excess dough hanging over the edges.
With the crust prepared and the cherry filling ready, you are now well on your way to creating the Sweet Cherry Bliss Tarts. Stay tuned for the next part, where we will assemble the tarts, bake them to perfection, and discuss some tips for achieving the best results!
Techniques for Properly Pressing the Dough into Tart Pans
Creating the perfect tart crust begins with properly pressing the dough into your tart pans. This step is crucial for ensuring that your crust maintains its shape during baking. Start by taking a portion of the chilled dough and breaking it into smaller pieces for easier handling. Using your fingertips, gently press the dough into the bottom of the tart pan, ensuring an even layer. Pay special attention to the corners and edges, as these areas are prone to cracking if not adequately filled.
Once the bottom is covered, use your fingers to press the dough up the sides of the pan. This technique requires a bit of finesse; it’s essential to keep the dough even across the sides to avoid any weak points that could break during the baking process. A helpful tip is to use the flat end of a measuring cup to smooth the edges and create a uniform thickness. If you notice any cracks forming, simply patch them with a bit of extra dough.
Blind Baking the Crusts
Blind baking is a critical step in tart preparation that involves pre-baking the crust without the filling. This process ensures that the crust is firm and flaky once the tart is fully assembled. To blind bake, preheat your oven to 375°F (190°C). Line the tart crust with parchment paper, allowing it to hang over the edges for easy removal later. Fill the lined crust with pie weights, dried beans, or rice to prevent the dough from puffing up during baking.
Bake the crust for about 15-20 minutes until it is lightly golden. The importance of this step cannot be overstated; without blind baking, the moisture from the cherry filling could cause the crust to become soggy, ruining the texture of your tarts.
Visual Cues for Knowing When the Crust is Ready
As you monitor the crust, look for specific visual cues. The edges should be a light golden brown, while the center may appear slightly paler. If the crust is puffing up, it’s essential to remove it from the oven and press it back down gently with a fork. After removing the weights and parchment paper, return it to the oven for an additional 5-10 minutes to achieve that perfect golden hue.
Crafting the Almond Topping
The almond topping is what elevates these Sweet Cherry Bliss Tarts to a whole new level. To create this delightful mixture, combine softened butter and sugar in a bowl and cream them together until light and fluffy. This process will incorporate air into the mixture, giving your topping a light texture. Gradually add in almond flour, all-purpose flour, and a pinch of salt, mixing until just combined.
When you mix the almond topping, aim for a texture that is thick yet spreadable. You want it to hold its shape when applied to the tarts but not be so hard that it becomes challenging to work with. The key ingredient here is almond extract, which adds a subtle yet significant flavor that enhances the overall taste profile of the tarts. Be generous but not overpowering; a teaspoon is typically sufficient to impart that unmistakable almond essence.
Assembling the Tarts
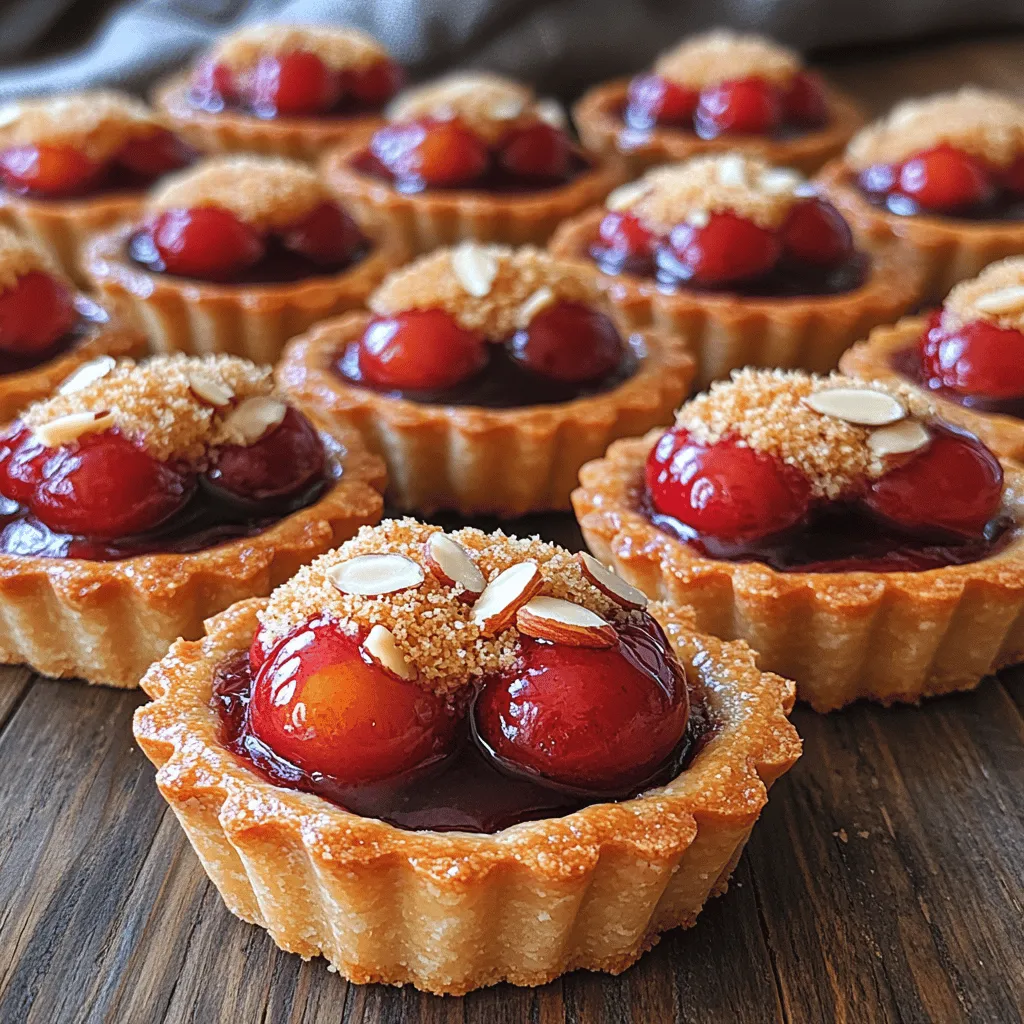
Now that your crusts are blind-baked and your almond topping is ready, it’s time to assemble the tarts. Start by filling each crust with your prepared cherry filling, distributing it evenly across the bottom. A helpful tip is to use a spoon to drop small amounts of filling into the crust, ensuring that every tart receives an equal share of those juicy cherries.
Once the filling is in place, use a spatula or the back of a spoon to spread the almond topping over the cherry filling. Aim for an even layer, taking care not to disturb the filling beneath. This layering technique not only creates a beautiful contrast but also ensures that the flavors meld during baking.
Final Baking Process
After the tarts are assembled, it’s time for the final baking process. Place the tarts back into the oven at 350°F (175°C) for approximately 25-30 minutes. Keep an eye on them as they bake; the almond topping should become a lovely golden brown color, indicating that it is done.
During the baking process, you’ll notice that the almond topping transforms from a pale batter to a rich, golden layer that adds both texture and flavor. The cherries will bubble slightly underneath, creating a tantalizing aroma that fills your kitchen.
Cooling and Serving Suggestions
Once your Sweet Cherry Bliss Tarts are out of the oven, allowing them to cool before serving is crucial. This cooling period helps the filling set, making it easier to slice and serve. Ideally, let the tarts cool in the pan for about 10-15 minutes before transferring them to a wire rack to cool completely.
For presentation, consider dusting the cooled tarts with powdered sugar or drizzling them with chocolate for an elegant touch. These tarts can be served chilled or at room temperature, allowing for versatility based on your preference. Chilled tarts provide a refreshing contrast to the warm cherry filling, while room-temperature tarts enhance the flavors of the almond topping.
Nutritional Information
When it comes to enjoying desserts, understanding the nutritional aspect can help with portion control. Each mini tart typically contains around 150-200 calories, depending on the specific ingredients used and the size of the tart. They provide a delightful balance of carbohydrates, fats, and sugars, making them a satisfying treat without overindulging. This recipe is also a great way to incorporate fresh fruits, providing a boost of vitamins and antioxidants.
Conclusion
Making Sweet Cherry Bliss Tarts is not just about creating a dessert; it’s about crafting a delightful experience that brings joy and satisfaction to both the maker and the eater. The combination of flaky crust, sweet cherry filling, and a luscious almond topping creates a symphony of flavors that is hard to resist.
Whether you’re preparing these tarts for a family gathering, a holiday celebration, or simply to enjoy with a cup of tea, this recipe is versatile enough to suit any occasion. So, roll up your sleeves, gather your ingredients, and embark on the delicious journey of making these delightful tarts. Your taste buds will thank you for it!
