Peach Bliss Crumble Bars Recipe: A Sweet Treat to Savor

WANT TO SAVE THIS RECIPE?

Introduction

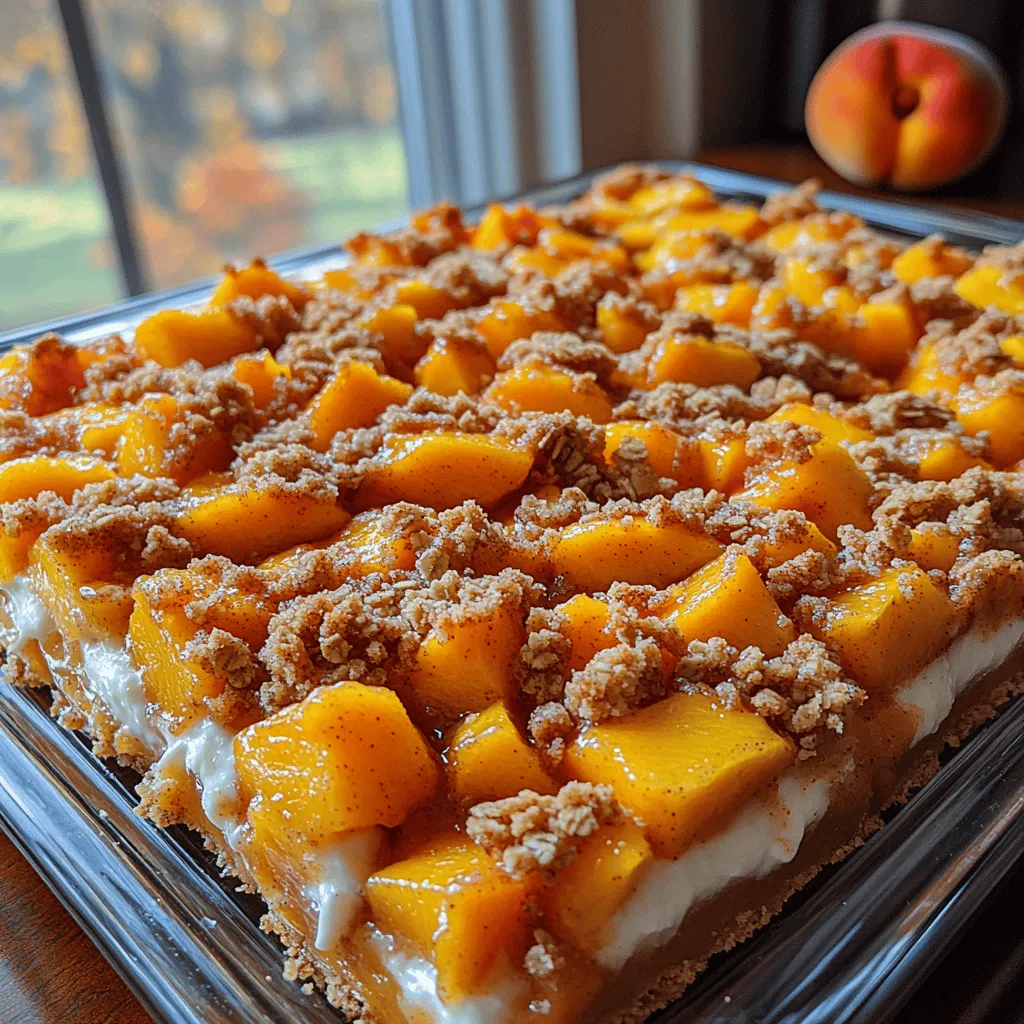
Welcome to a delightful culinary adventure with Peach Bliss Crumble Bars! This scrumptious dessert combines the juicy sweetness of fresh peaches with a buttery, crumbly topping that creates a mouthwatering experience for both the eyes and the palate. Imagine biting into a golden bar where the sweet and tangy peach filling meets a crumbly, crisp texture, perfectly balanced by a creamy layer that brings everything together. These bars are not just a treat; they’re a celebration of summer’s bounty, making them the ideal dessert for picnics, potlucks, or simply enjoying at home.

Using seasonal ingredients is essential in any recipe, and for Peach Bliss Crumble Bars, ripe, fresh peaches are the star of the show. When peaches are in season, they are at their sweetest and juiciest, lending an incredible depth of flavor and an irresistible aroma to your dessert. The vibrant colors of ripe peaches not only make these bars visually appealing but also enhance the overall taste. Selecting the best peaches will ensure that your bars are bursting with flavor and have the perfect texture, making every bite a heavenly moment.

In this article, we promise to guide you through a straightforward process to create these scrumptious Peach Bliss Crumble Bars. Whether you’re a novice baker or a seasoned pro, you will find that this recipe is easy to follow and yields a dessert that everyone will adore. Get ready to roll up your sleeves and immerse yourself in the world of baking with us!

Understanding the Components of Peach Bliss Crumble Bars

To fully appreciate the Peach Bliss Crumble Bars, it’s important to understand the key components that make up this delicious dessert. The recipe is structured around three main layers: the peach filling, the crumble base and topping, and the cream layer. Each of these layers plays a crucial role in contributing to the overall flavor profile and texture of the bars.

1. The Peach Filling: This layer is the heart of the dessert, featuring ripe peaches that provide natural sweetness and juiciness. The filling is enhanced with a touch of lemon juice to brighten the flavors and vanilla extract for an aromatic essence that complements the peaches beautifully. Cornstarch is added to thicken the filling, ensuring that it holds together when baked, while a sprinkle of cinnamon adds warmth and depth to the flavor.

2. Crumble Base and Topping: The crumble base adds a delightful crunch and buttery richness to the bars. The combination of flour and oats creates a satisfying texture that contrasts perfectly with the soft peach filling. Using brown sugar instead of granulated sugar not only adds moisture but also imparts a subtle caramel flavor that elevates the crumble. A pinch of salt enhances the overall taste, while baking soda contributes to a light and airy texture.

3. Cream Layer: To round out the dessert, a creamy layer is added on top of the peach filling. Cream cheese plays a vital role in creating a smooth, rich texture, while heavy cream and powdered sugar help to achieve a light and fluffy finish. This layer balances the sweetness of the peaches and crumble, adding a luxurious touch that makes these bars truly indulgent.

Ingredients Breakdown

Now that we have an understanding of the layers, let’s take a closer look at the specific ingredients that come together to create the Peach Bliss Crumble Bars.

Peach Filling

Ripe Peaches: The most crucial component of this recipe, ripe peaches should be fragrant and slightly soft to the touch. Their natural sweetness and juiciness are what make this dessert so delightful. When selecting peaches, look for ones that yield slightly under pressure but are not overly soft or bruised.

Lemon Juice: A splash of lemon juice not only prevents the peaches from browning but also enhances their flavor by adding a zesty brightness that balances the sweetness.

Vanilla Extract: A few drops of vanilla extract provide a warm, aromatic note that complements the natural flavor of the peaches, making the filling even more delicious.

Cornstarch: This ingredient is essential for thickening the peach filling, ensuring that it doesn’t become too runny during baking. Cornstarch helps the filling bind together, making it easier to slice once the bars are set.

Cinnamon: A dash of cinnamon adds warmth and depth to the peach filling, enhancing the overall flavor profile and making it reminiscent of a warm, homemade peach pie.

Crumble Base and Topping

Flour: All-purpose flour is the foundation of the crumble, providing structure and stability to the bars.

Oats: Rolled oats add a chewy texture and a wholesome element to the crumble, creating a satisfying contrast to the soft peach filling.

Brown Sugar: Opting for brown sugar over granulated sugar not only adds moisture but also contributes a rich, caramel-like flavor that pairs beautifully with the peaches.

Salt: A pinch of salt is essential in baking; it enhances the flavors of the other ingredients and balances the sweetness.

Baking Soda: This leavening agent helps the crumble achieve a lighter texture, ensuring that it is not too dense.

Cream Layer

Cream Cheese: Softened cream cheese is the star of the cream layer, providing richness and a smooth texture that envelops the peach filling.

Heavy Cream: Adding heavy cream ensures that the cream layer is luscious and decadent. It also helps achieve a light texture when whipped.

Powdered Sugar: This ingredient sweetens the cream layer and helps it achieve a smooth, velvety finish that complements the other components of the bars.

Step-by-Step Guide to Making Peach Bliss Crumble Bars

Now that we’ve explored the ingredients that will bring our Peach Bliss Crumble Bars to life, it’s time to dive into the step-by-step process of creating this delightful dessert. Each step is designed to ensure that your bars turn out perfectly, bursting with flavor and texture. Let’s get started!

1. Prepare the Peaches: Begin by washing and peeling the ripe peaches. Once peeled, slice them into thin wedges and place them in a mixing bowl. Add lemon juice, vanilla extract, cornstarch, and cinnamon to the peaches, gently tossing to coat them evenly. Set the mixture aside to allow the flavors to meld while you prepare the crumble.

2. Make the Crumble: In a separate large mixing bowl, combine the flour, oats, brown sugar, salt, and baking soda. Mix well until all the dry ingredients are fully incorporated. Next, add in melted butter, using a fork or your fingers to combine the mixture until it resembles coarse crumbs. Set aside one cup of the crumble mixture to use as the topping later.

3. Assemble the Bars: Preheat your oven to 350°F (175°C). Grease a baking dish or line it with parchment paper for easy removal. Press the crumble mixture into the bottom of the prepared baking dish, creating an even layer. Make sure to pack it down firmly to form a solid base for the bars.

4. Add the Peach Filling: Pour the prepared peach filling over the pressed crumble base, spreading it out evenly with a spatula. Ensure that the peach filling is distributed uniformly for consistent flavor in every bite.

5. Top with Crumble: Finally, sprinkle the reserved crumble mixture over the peach filling, covering it completely. This crumbly topping will brown beautifully in the oven, creating a crunchy texture that contrasts perfectly with the creamy peach filling beneath.

Stay tuned for the next part of our Peach Bliss Crumble Bars recipe, where we’ll guide you through the baking process and share tips for achieving the best results!

- <strong>Ripe Peaches</strong>: The most crucial component of this recipe, ripe peaches should be fragrant and slightly soft to the touch. Their natural sweetness and juiciness are what make this dessert so delightful. When selecting peaches, look for ones that yield slightly under pressure but are not overly soft or bruised.” /></p>
</p>
<h3>Preparing the Peach Filling</h3>
</p>
<p>To create a delicious and aromatic peach filling for your Peach Bliss Crumble Bars, start by selecting ripe, juicy peaches. The quality of your fruit is essential; look for peaches that yield slightly to pressure and have a sweet aroma. Follow these detailed instructions for preparing the peach filling:</p>
</p>
<p>1. <strong>Macerate the Peaches</strong>: Begin by washing and peeling your peaches. Once peeled, slice them into small pieces, approximately 1/2-inch thick. Place the diced peaches in a mixing bowl and add 2 tablespoons of granulated sugar and 1 tablespoon of lemon juice. The sugar will help draw out the natural juices of the peaches, enhancing their flavor while the lemon juice adds brightness and balances sweetness.</p>
</p>
<p>2. <strong>Mix and Let Sit</strong>: Gently stir the peaches to coat them in the sugar and lemon juice mixture. Allow the peaches to sit for about 15-20 minutes. This process, known as maceration, will soften the peaches and create a syrupy filling that will meld beautifully with the crumble base.</p>
</p>
<p>3. <strong>Thicken the Filling</strong>: After macerating, you may want to thicken the filling to prevent excess moisture from making your bars soggy. Add 1 tablespoon of cornstarch to the peach mixture and stir until it is well combined. This will help achieve a perfect balance of sweetness and texture in the filling.</p>
</p>
<h4>Tips for Achieving the Perfect Peach Filling</h4>
</p>
<p>– <strong>Choose the Right Peaches</strong>: Freestone peaches are ideal for this recipe since they come off the pit easily. If you can only find clingstone peaches, just make sure to slice them carefully.</p>
<p>– <strong>Adjust Sweetness</strong>: Depending on the ripeness of your peaches, you may need to adjust the sugar content. Taste a slice of peach and determine if more sugar is necessary before macerating.</p>
<p>– <strong>Flavor Boost</strong>: For an extra layer of flavor, consider adding a pinch of cinnamon or nutmeg to your peach filling.</p>
</p>
<h3>Crafting the Crumble Base</h3>
</p>
<p>Now that your peach filling is ready, it’s time to create the crumble base that will hold everything together. This step is essential for ensuring a beautifully textured dessert.</p>
</p>
<p>1. <strong>Mix the Dry Ingredients</strong>: In a large mixing bowl, combine 1 ½ cups of all-purpose flour, 1 cup of rolled oats, ½ cup of brown sugar, and ½ teaspoon of salt. Use a whisk to ensure the ingredients are well blended.</p>
</p>
<p>2. <strong>Incorporate the Butter</strong>: Cut 1 cup (2 sticks) of cold unsalted butter into small cubes and add it to the dry ingredients. Using a pastry cutter or your fingertips, work the butter into the flour mixture until it resembles coarse crumbs. You want to see pea-sized pieces of butter throughout—this will help create a flaky texture once baked.</p>
</p>
<p>3. <strong>Form the Crumble</strong>: Reserve about 1 cup of the crumble mixture for topping the bars later. Press the remaining crumble mixture firmly into the bottom of a greased 9×13 inch baking dish, creating an even layer. The filling will need a solid base to sit upon.</p>
</p>
<h4>Techniques to Achieve the Right Crumble Consistency</h4>
</p>
<p>– <strong>Cold Ingredients</strong>: Ensure your butter is cold; this is crucial for achieving a flaky texture. If your kitchen is warm, you can chill the flour mixture before adding the butter.</p>
<p>– <strong>Do Not Overmix</strong>: Mix until just combined. Overworking the dough can lead to tough bars rather than a tender crumble.</p>
<p>– <strong>Texture Check</strong>: When you pinch the crumble mixture, it should hold together but still have a crumbly texture. If it feels too dry, add a teaspoon of cold water to help bind it.</p>
</p>
<h3>Assembling the Bars</h3>
</p>
<p>With both the peach filling and crumble base ready, it’s time to assemble your Peach Bliss Crumble Bars:</p>
</p>
<p>1. <strong>Layer the Components</strong>: First, spread the peach filling evenly over the pressed crumble base in the baking dish. Use a spatula to ensure that the filling is distributed uniformly, reaching all corners of the dish.</p>
</p>
<p>2. <strong>Add the Reserved Crumble</strong>: Sprinkle the reserved crumble mixture over the peach filling. Try to cover it as evenly as possible; this will create a delightful topping that bakes up golden brown and crunchy.</p>
</p>
<h4>Tips for Ensuring Even Distribution of the Cream Layer</h4>
</p>
<p>– <strong>Use a Spatula</strong>: A spatula can help you spread the peach filling evenly without disturbing the base layer.</p>
<p>– <strong>Dollop Method</strong>: Instead of spreading, you can dollop the peach filling in various spots and then gently spread it out. This can help maintain an even layer without mixing the base and filling.</p>
<p>– <strong>Final Touch</strong>: Before baking, gently press down on the crumble topping to ensure it adheres to the filling below.</p>
</p>
<h3>Baking the Bars</h3>
</p>
<p>Now that your dessert is assembled, it’s time to bake:</p>
</p>
<p>1. <strong>Preheat Your Oven</strong>: Set your oven to 350°F (175°C). Preheating is crucial for even baking.</p>
</p>
<p>2. <strong>Bake</strong>: Place the baking dish in the preheated oven and bake for 35-40 minutes. The crumble topping should turn golden brown and the filling should be bubbly.</p>
</p>
<h4>Signs to Look For to Ensure the Bars Are Perfectly Baked</h4>
</p>
<p>– <strong>Golden Top</strong>: The crumble should be a nice golden brown color.</p>
<p>– <strong>Bubbling Filling</strong>: Look for bubbling around the edges of the peach filling, indicating that it has cooked through.</p>
<p>– <strong>Firmness Test</strong>: Gently press the top of the bars; they should feel set, not jiggly.</p>
</p>
<h3>Cooling and Serving</h3>
</p>
<p>Patience is key when it comes to cutting your Peach Bliss Crumble Bars. Allow them to cool in the baking dish for at least 30 minutes before slicing.</p>
</p>
<p>1. <strong>Cooling</strong>: The cooling step is essential for the bars to set properly. If you cut them too soon, the filling may ooze out, resulting in messy slices.</p>
</p>
<p>2. <strong>Slice and Serve</strong>: Once cooled, use a sharp knife to cut the bars into squares or rectangles. For a clean cut, wipe the knife with a damp cloth between each slice.</p>
</p>
<h4>Suggestions for Serving: Warm vs. Room Temperature, with or without Toppings</h4>
</p>
<p>– <strong>Warm</strong>: These bars are delightful served warm, especially when paired with a scoop of vanilla ice cream that melts into the warm peach filling.</p>
<p>– <strong>Room Temperature</strong>: They also taste fantastic at room temperature, making them easy to serve at gatherings or picnics.</p>
<p>– <strong>Toppings</strong>: Consider serving with whipped cream, a drizzle of caramel sauce, or a sprinkle of chopped nuts for added texture.</p>
</p>
<h3>Nutritional Value and Serving Suggestions</h3>
</p>
<h4>Analysis of the Nutritional Content</h4>
</p>
<p>When it comes to enjoying Peach Bliss Crumble Bars, understanding their nutritional value can help you enjoy them guilt-free. Each serving (1 bar) contains approximately:</p>
</p>
<p>– <strong>Calories</strong>: 250-300</p>
<p>– <strong>Fats</strong>: 12-15 grams (depending on the butter used)</p>
<p>– <strong>Sugars</strong>: 15-20 grams from the peaches and added sugars</p>
<p>– <strong>Key Vitamins</strong>: Peaches provide vitamin C, vitamin A, and dietary fiber, making these bars a delicious option for dessert.</p>
</p>
<h4>Suggest Variations for Healthier Alternatives or Dietary Restrictions</h4>
</p>
<p>– <strong>Gluten-Free Options</strong>: Substitute the all-purpose flour with a 1:1 gluten-free flour blend, ensuring that the oats are certified gluten-free.</p>
<p>– <strong>Lower Sugar</strong>: Reduce the sugar content or substitute with natural sweeteners like honey or maple syrup, adjusting the liquid content accordingly.</p>
<p>– <strong>Dairy-Free</strong>: Use coconut oil or vegan butter in place of regular butter to make the bars dairy-free.</p>
</p>
<h3>Ideas for Serving and Pairing</h3>
</p>
<p>Peach Bliss Crumble Bars are not only perfect as a dessert but can also double as a delightful breakfast or snack option:</p>
</p>
<p>– <strong>Pairing with Ice Cream</strong>: For an elevated dessert experience, serve these bars with a scoop of vanilla bean ice cream or a dollop of freshly whipped cream.</p>
<p>– <strong>Breakfast Treat</strong>: Enjoy a slice with your morning coffee or tea, as the sweet peach filling and crumble make for a satisfying breakfast.</p>
<p>– <strong>Snack Time</strong>: Pack a bar in your lunch or enjoy as an afternoon snack to curb your sweet cravings.</p>
</p>
<h3>Conclusion</h3>
</p>
<p>Making Peach Bliss Crumble Bars at home is a joyful experience that not only fills your kitchen with the delightful aroma of baked peaches but also brings a sense of accomplishment. The combination of sweet, juicy peaches with a buttery crumble topping creates a dessert that is hard to resist.</p>
</p>
<p>As you enjoy this recipe, consider experimenting with seasonal fruits, such as blueberries, cherries, or apples, to create your own unique variations. The satisfaction of sharing these homemade treats with family and friends will undoubtedly make your efforts worthwhile. So preheat your oven, gather your ingredients, and indulge in the bliss of making your own Peach Bliss Crumble Bars today!</p>
</div>

- Ripe Peaches: The most crucial component of this recipe, ripe peaches should be fragrant and slightly soft to the touch. Their natural sweetness and juiciness are what make this dessert so delightful. When selecting peaches, look for ones that yield slightly under pressure but are not overly soft or bruised.

Peaches and Cream Crumble Bars

Dive into the delicious world of baking with our Peach Bliss Crumble Bars! This recipe features juicy, ripe peaches nestled under a buttery crumble topping, complemented by a rich cream layer. Perfect for summer gatherings, picnics, or simply enjoying at home, these bars are easy to make and sure to impress. Learn how to create this delightful dessert that showcases seasonal flavors and brings a taste of sunshine to your table. Get ready to bake and savor every bite!

Ingredients
  

For the Peach Filling:

4 medium ripe peaches, peeled and diced

1/4 cup granulated sugar

1 tablespoon lemon juice

1 teaspoon vanilla extract

1 tablespoon cornstarch

1/2 teaspoon cinnamon

For the Crumble Base & Topping:

1 1/2 cups all-purpose flour

1 cup rolled oats

3/4 cup packed brown sugar

1/2 teaspoon salt

1 teaspoon baking soda

1/2 cup unsalted butter, melted

1/2 teaspoon vanilla extract

For the Cream Layer:

8 oz cream cheese, softened

1/4 cup powdered sugar

1 teaspoon vanilla extract

1/4 cup heavy cream

Instructions
 

Prepare the Peach Filling:

    - In a medium bowl, combine the diced peaches, granulated sugar, lemon juice, vanilla extract, cornstarch, and cinnamon. Stir gently until the peaches are well coated. Set aside to allow the mixture to macerate for about 10 minutes.

      Make the Crumble Base:

        - Preheat your oven to 350°F (175°C). Grease a 9x9-inch baking dish or line it with parchment paper for easy removal.

          - In a large bowl, mix together the flour, rolled oats, brown sugar, salt, and baking soda.

            - Pour in the melted butter and vanilla extract, and stir until the mixture is crumbly but combined (it may still have some larger clumps).

              Assemble the Bars:

                - Press about two-thirds of the crumble mixture into the bottom of the prepared baking dish, creating an even layer.

                  - Spread the peach filling over the crumble base, ensuring that it covers the entire area.

                    - In a separate bowl, prepare the cream layer by beating together the softened cream cheese, powdered sugar, and vanilla extract until smooth. Gradually mix in the heavy cream and beat until just combined.

                      - Pour the cream layer over the peach filling, spreading it gently to cover it completely.

                        Top with Remaining Crumble:

                          - Sprinkle the remaining crumble mixture on top of the cream layer, distributing it evenly.

                            Bake:

                              - Bake in the preheated oven for 35-40 minutes, or until the top is golden brown and the filling is bubbling.

                                - Remove from the oven and allow it to cool in the pan for at least 20 minutes before cutting into bars.

                                  Serve:

                                    - Once cooled, lift the bars from the baking dish using the parchment paper (if used). Cut into squares and serve warm or at room temperature.

                                      Prep Time, Total Time, Servings: 20 mins | 1 hr | 12 bars

                                        WANT TO SAVE THIS RECIPE?

                                        Leave a Comment

                                        Recipe Rating