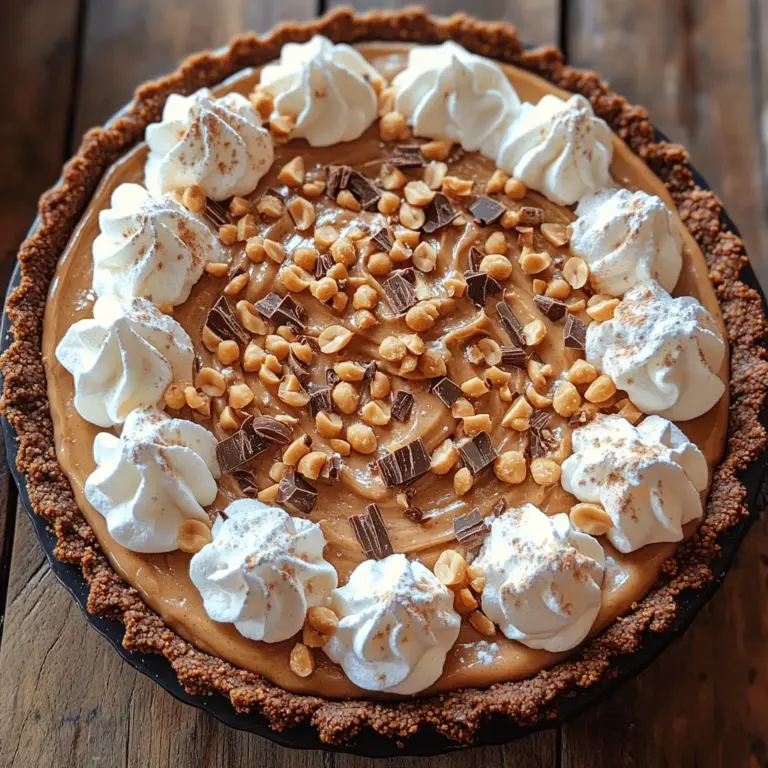
Indulging in a slice of Heavenly Peanut Butter Dream Pie is an experience that delights the senses. This no-bake dessert combines the rich flavors of creamy peanut butter, chocolate, and whipped cream, creating a heavenly treat perfect for any occasion. Whether you’re hosting a gathering or simply satisfying a sweet tooth, this pie promises to impress. It’s a dessert that not only looks stunning but also tantalizes the taste buds with its creamy texture and delightful mix of flavors. In this article, we will explore the intricacies of creating this delightful dessert, with step-by-step instructions and essential tips to ensure your pie turns out perfectly every time.
Understanding the Components of Heavenly Peanut Butter Dream Pie
To create the perfect Heavenly Peanut Butter Dream Pie, it’s essential to understand the key components that make this dessert truly special. Each element contributes to the overall flavor and texture, ensuring that every bite is a delight.
The Importance of the Crust
The crust is the foundation of any pie, and for the Heavenly Peanut Butter Dream Pie, a graham cracker crust serves as the ideal base. The sweetness and subtle crunch of the graham crackers provide a delightful contrast to the creamy filling above. However, to elevate this classic crust, we enhance it with cocoa powder, introducing a rich chocolate flavor that perfectly complements the peanut butter filling.
Using cocoa powder not only enriches the taste but also adds visual appeal, creating a dark, inviting crust that sets the stage for the decadent filling. The role of butter in this mixture cannot be overlooked; it acts as a binding agent, ensuring that the crumbs hold together while adding a touch of richness. The combination of graham cracker crumbs, cocoa powder, and melted butter results in a crust that is both flavorful and sturdy, providing the perfect vehicle for the creamy filling.
The Filling: A Creamy Delight
The filling of the Heavenly Peanut Butter Dream Pie is where the magic happens. This luscious layer is primarily composed of peanut butter, cream cheese, and powdered sugar. Each of these ingredients plays a crucial role in creating the velvety texture and rich flavor that characterize this dessert.
To achieve a smooth and creamy filling, it’s essential to soften the cream cheese before mixing. This step allows for easy blending, resulting in a lump-free, silky mixture. The harmonious blend of peanut butter and powdered sugar strikes the perfect balance between sweet and nutty, ensuring that the filling is both satisfying and indulgent.
The choice of peanut butter is also important—opt for a creamy variety that blends seamlessly into the filling, creating a luscious texture that melts in your mouth. For those who prefer a bit of crunch, consider using chunky peanut butter for added texture.
The Topping: A Light Finish
To balance the richness of the filling, a generous layer of whipped cream serves as a light and airy topping. This fluffy addition not only enhances the pie’s visual appeal but also provides a refreshing contrast to the dense filling. The whipped cream’s lightness complements the creamy peanut butter, ensuring that each bite is not too heavy.
For a touch of elegance and added flavor, consider optional toppings such as crushed peanuts or chocolate shavings. These additions not only enhance the pie’s presentation but also introduce interesting textures and flavors, making every slice a delightful surprise.
Step-by-Step Instructions for Heavenly Peanut Butter Dream Pie
Creating the Heavenly Peanut Butter Dream Pie is a straightforward process, especially because it requires no baking. Follow these detailed instructions to ensure that your pie turns out perfectly.
Preparing the Crust
1. Gather Your Ingredients: To create the graham cracker crust, you will need:
– 1 ½ cups of graham cracker crumbs
– ½ cup of cocoa powder
– ½ cup of unsalted butter, melted
– ¼ cup of sugar (optional, depending on your sweetness preference)
2. Mix the Ingredients: In a medium-sized bowl, combine the graham cracker crumbs, cocoa powder, and sugar (if using). Pour in the melted butter and mix thoroughly until the crumbs are evenly coated and the mixture resembles wet sand.
3. Press the Crust: Transfer the crumb mixture into a 9-inch pie dish. Using the back of a measuring cup or your fingers, press the mixture firmly and evenly across the bottom and up the sides of the dish. It’s important to compact the crust well to prevent it from crumbling when you slice the pie.
4. Bake or Chill: If you prefer a slightly firmer crust, you may choose to bake it in a preheated oven at 350°F (175°C) for about 8-10 minutes. If you would rather keep it a no-bake recipe, simply place the crust in the refrigerator for at least 30 minutes to set.
5. Cool the Crust: Allow the crust to cool completely before adding the filling. This step is crucial as a warm crust can cause the filling to melt and lose its structure.
Crafting the Creamy Filling
1. Prepare the Ingredients: For the filling, gather the following ingredients:
– 8 oz cream cheese, softened
– 1 cup creamy peanut butter
– 1 cup powdered sugar
– 1 cup heavy whipping cream
– 1 tsp vanilla extract
2. Blend the Cream Cheese: In a large mixing bowl, use an electric mixer to beat the softened cream cheese until smooth and creamy. This step is essential for achieving a lump-free filling.
3. Add Peanut Butter and Sugar: Gradually add the peanut butter and powdered sugar to the cream cheese, mixing on low speed until fully combined. Increase the speed to medium and continue mixing until the filling is smooth and well-blended.
4. Incorporate Whipped Cream: In a separate bowl, whip the heavy cream until soft peaks form. This step is crucial for achieving a light texture in your filling. Gently fold the whipped cream into the peanut butter mixture, being careful not to deflate the cream. This will ensure that your filling remains airy and light.
5. Enhance with Vanilla: Add the vanilla extract to the filling and fold it in gently. The vanilla adds depth of flavor, enhancing the overall taste of the filling.
6. Fill the Crust: Once your filling is ready, spoon it into the cooled crust, smoothing the top with a spatula.
7. Chill the Pie: Cover the pie with plastic wrap and place it in the refrigerator for at least 4 hours, or ideally overnight. This chilling time allows the filling to set properly, resulting in a pie that holds its shape when sliced.
The Heavenly Peanut Butter Dream Pie is now well on its way to being the star of your dessert table. With its rich layers and delightful textures, this pie is sure to impress family and friends alike. Stay tuned for the next part, where we will discuss the final touches and essential tips to achieve the perfect presentation.
Assembling the Pie
Once you have prepared your luscious peanut butter filling and baked your crust to perfection, it’s time to assemble your Heavenly Peanut Butter Dream Pie. This step is crucial to achieving a smooth and appealing presentation.
Techniques for Smoothing the Filling into the Crust
Begin by gently spooning the peanut butter filling into the cooled pie crust. Use a rubber spatula to carefully spread the filling evenly. Start from the center and work your way outwards, ensuring the filling reaches the edges of the crust. To achieve a perfectly smooth surface, dip the spatula in warm water; this will help glide it over the filling without dragging or creating air pockets. If you prefer a textured top, you can use the spatula to create gentle swirls.
Importance of Refrigeration for Setting the Pie
Once your filling is evenly spread, cover the pie with plastic wrap or a pie cover and place it in the refrigerator. Refrigerating allows the filling to set properly, enhancing both the texture and flavor. Ideally, let it chill for at least four hours, but overnight is even better. This will give you a firmer pie that’s easier to slice and serve.
Visual Cues to Look for When Determining if the Pie is Ready
After the chilling period, check for visual cues that indicate your pie is ready. The filling should be firm to the touch but not overly hard; it should hold its shape when sliced. The surface should also have a slight sheen, indicating that the peanut butter has melded well with the other ingredients. If the pie appears overly wobbly, return it to the refrigerator for an additional hour.
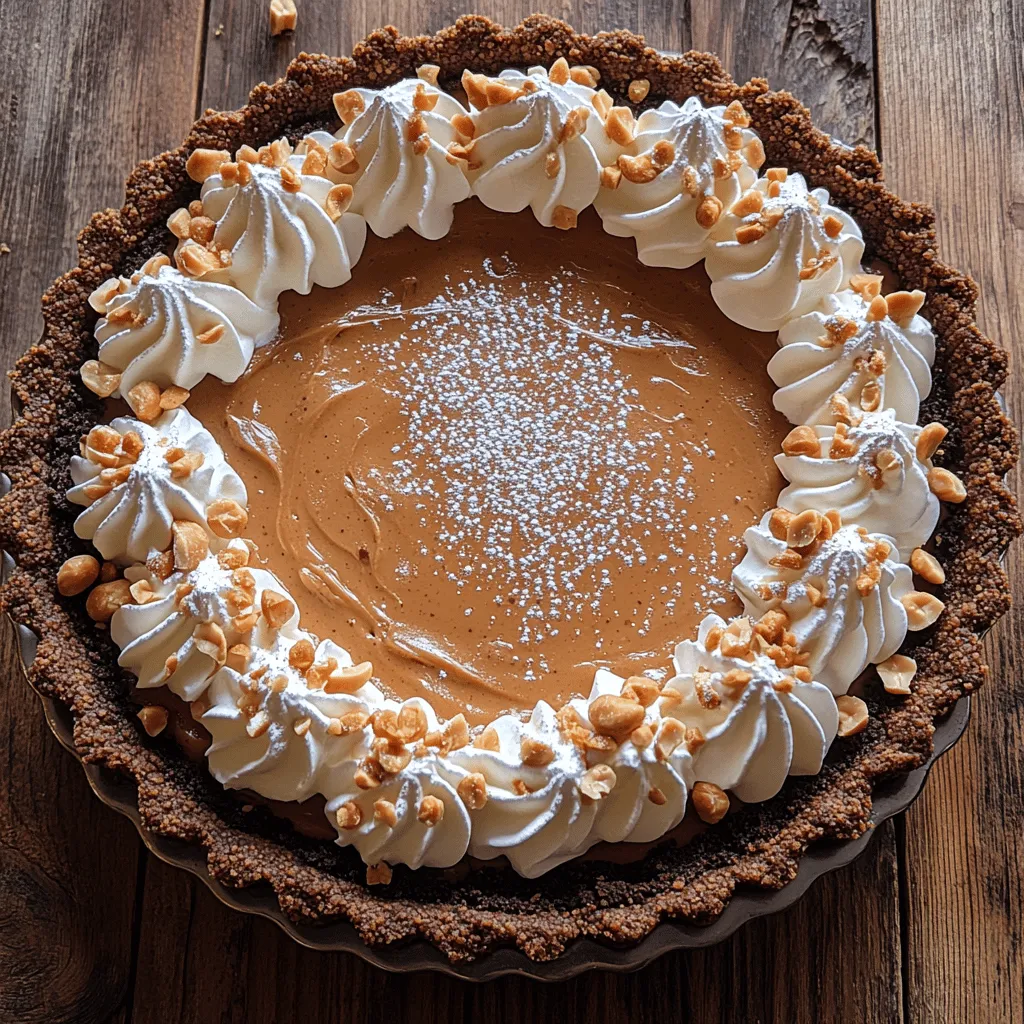
Finishing Touches with the Topping
The final flourish of your Heavenly Peanut Butter Dream Pie comes with the whipped cream topping. This is what elevates the pie from delicious to divine.
Instructions for Whipping Cream to the Perfect Consistency
To make the whipped cream, start with a mixing bowl and beaters that are chilled. This helps the cream whip faster and achieve a fluffier consistency. Pour in one cup of heavy cream along with two tablespoons of powdered sugar and a splash of vanilla extract for flavor. Beat on medium speed until soft peaks form, then switch to high speed until you reach stiff peaks. Be cautious not to overwhip, or you may end up with butter instead of cream.
Creative Ideas for Decorating the Pie with Optional Toppings
Once your whipped cream is ready, gently spread it over the top of the pie using a spatula. For an extra touch, consider adding some peanut butter drizzle by melting a few tablespoons of peanut butter in the microwave and drizzling it on top. Chopped peanuts, chocolate shavings, or mini chocolate chips make excellent garnishes that add both texture and visual appeal. If you’re feeling adventurous, sprinkle a bit of sea salt for a sweet and salty contrast.
Serving Suggestions for an Appealing Presentation
When serving your pie, slice it into wedges and consider pairing it with fresh fruit, such as strawberries or raspberries, to balance the richness of the pie. Plating each slice on a colorful dessert plate can enhance the presentation. For an added touch, serve with a dollop of remaining whipped cream on the side for guests to add as they please.
Nutritional Insights of Heavenly Peanut Butter Dream Pie
Understanding the nutritional profile of your ingredients can help you enjoy your Heavenly Peanut Butter Dream Pie with mindfulness.
Nutritional Breakdown of Key Ingredients
– Peanut Butter: A rich source of protein and healthy fats, peanut butter also provides essential vitamins and minerals, such as Vitamin E and magnesium. However, it is calorie-dense, so moderation is key.
– Heavy Cream: While heavy cream is high in fat, it also contains calcium and vitamin A. The cream contributes to the pie’s luxurious texture, making it a worthwhile indulgence.
– Sugar and Other Ingredients: The sugar content can be adjusted based on your preferences, and using powdered sugar in the whipped cream helps achieve a smooth texture without the graininess of granulated sugar.
The Balance of Indulgence and Nutrition in Moderation
This pie, while indulgent, can be enjoyed as part of a balanced diet. It’s essential to appreciate it as a treat rather than a daily dessert. Enjoying a slice alongside some fresh fruit can enhance the nutritional value while satisfying your sweet tooth.
Serving Size and Portion Control
When it comes to enjoying your Heavenly Peanut Butter Dream Pie, portion control is vital for maintaining balance.
Recommended Serving Sizes for Enjoyment Without Overindulgence
A standard serving size for this pie is about one-eighth of the pie. This portion allows you to savor the rich flavors without feeling overly full. If you find it challenging to resist, consider serving smaller slices for gatherings, enabling everyone to enjoy a taste without overindulging.
Tips for Pairing the Pie with Lighter Options
To create a well-rounded dessert experience, consider pairing your pie with lighter options. Fresh fruit, like a side of mixed berries or a vibrant fruit salad, not only adds color but also provides a refreshing contrast to the creamy pie. A scoop of low-calorie sorbet can also complement the richness of the pie and offer a delightful palate cleanser.
Variations to Explore
One of the joys of cooking is experimenting with variations to suit different tastes and dietary needs.
Flavor Twists
– Alternative Fillings: For those who love chocolate, consider adding a layer of dark chocolate ganache underneath the peanut butter filling. Alternatively, try using almond butter or cashew butter for a nutty twist.
– Crust Variations: If you’re looking for a gluten-free option, substitute the traditional graham cracker crust with crushed gluten-free cookies or even a nut-based crust made from almond flour and dates.
Dietary Considerations
For those following a vegan or dairy-free diet, substitute the heavy cream with coconut cream and use a plant-based cream cheese alternative. You can also replace the powdered sugar with a sugar substitute like stevia or erythritol, ensuring that everyone can enjoy this decadent dessert.
Conclusion
Heavenly Peanut Butter Dream Pie is more than just a dessert; it’s a celebration of flavors that brings joy to any table. With its creamy filling, rich crust, and fluffy topping, this pie is a delightful treat that appeals to both peanut butter lovers and dessert enthusiasts alike. By following the detailed instructions and insights provided, you can recreate this luscious pie at home and impress your friends and family with your culinary skills. Whether enjoyed at a gathering or as a sweet personal treat, this pie is sure to be a memorable highlight.
With its versatile nature, the pie can be adapted to suit various dietary preferences and flavor profiles, ensuring that it remains a beloved choice for all occasions. So gather your ingredients, unleash your creativity, and prepare to share this delectable pie that embodies the essence of indulgence and joy.