Introduction
As warm weather approaches, the search for refreshing treats becomes paramount. Homemade ice cream has surged in popularity, offering a delightful way to cool down on hot days. The charm of creating your very own frozen dessert lies not only in the ability to customize flavors but also in the satisfaction of crafting something delicious from scratch. Among the myriad of ice cream recipes available, one stands out for its simplicity and taste: Delightfully Creamy No-Churn Raspberry Ice Cream.
This recipe is a game-changer for ice cream enthusiasts, particularly for those who may not have access to an ice cream maker. It promises a luscious texture and a burst of fresh raspberry flavor without the need for specialized equipment. With a few simple ingredients and minimal effort, you can create a creamy, refreshing treat that will impress friends and family alike. So, let’s dive into the world of no-churn ice cream and explore why this recipe is a must-try for any dessert lover.
The Allure of No-Churn Ice Cream
No-churn ice cream has gained momentum in recent years, transforming the way people approach homemade frozen desserts. For those unfamiliar, no-churn ice cream refers to a style of ice cream that does not require the traditional churning process, which is essential in conventional ice cream making. Instead, it utilizes whipped cream and sweetened condensed milk, allowing for a smooth and creamy texture without the need for an ice cream maker.
Benefits of No-Churn Recipes
The appeal of no-churn ice cream lies in its simplicity. With minimal equipment required—often just a mixing bowl and a whisk—you can whip up delicious desserts in no time. This approach is not only time-saving but also perfect for those who may be intimidated by the more intricate processes of traditional ice cream making.
Moreover, no-churn ice cream is incredibly versatile. The base recipe can be adapted to create an array of flavors, from classic vanilla to exotic mango or rich chocolate. By incorporating various fruits, nuts, or even swirls of caramel, you can experiment with different combinations to suit your taste preferences. This adaptability makes it an enticing option for both casual dessert makers and culinary enthusiasts.
Ingredients Breakdown
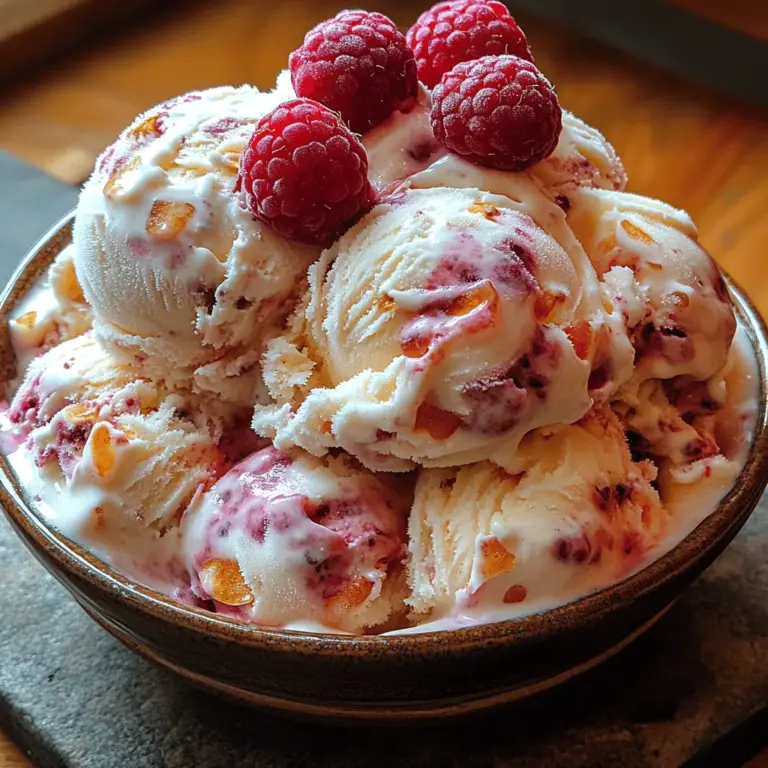
To create the Delightfully Creamy No-Churn Raspberry Ice Cream, you’ll need a handful of ingredients that work harmoniously to deliver maximum flavor and texture. Let’s break down each component:
Fresh Raspberries
Raspberries are the star of this recipe, bringing a vibrant color and tartness that perfectly balances the creaminess of the dessert. Not only do they add a delightful flavor, but they are also packed with nutritional benefits. Raspberries are rich in vitamins C and K, high in fiber, and loaded with antioxidants, making them a healthy addition to your ice cream.
Granulated Sugar
Sugar plays a crucial role in this recipe, providing the necessary sweetness to balance the tartness of the raspberries. It also contributes to the overall texture of the ice cream, helping to prevent ice crystals from forming. The right amount of sugar ensures that each spoonful is a delightful blend of creamy and sweet.
Vanilla Extract
A splash of vanilla extract elevates the flavor profile, adding depth and warmth to the ice cream. It enhances the natural sweetness of the raspberries while imparting a lovely aroma that makes this dessert even more inviting. Using pure vanilla extract will yield the best results and a more robust flavor.
Heavy Whipping Cream
Heavy whipping cream is essential for achieving the signature creaminess that makes this ice cream so delightful. The high-fat content in heavy cream allows for a rich texture that is smooth and indulgent. When whipped, it incorporates air, contributing to a light and airy mouthfeel that sets this no-churn ice cream apart.
Sweetened Condensed Milk
Sweetened condensed milk is a key ingredient in no-churn ice cream recipes, providing both sweetness and creaminess. It acts as a stabilizer, ensuring that the ice cream remains soft and scoopable even after freezing. This ingredient is what makes no-churn ice cream so easy to prepare and results in a consistently creamy texture.
Salt
While it may seem counterintuitive to add salt to a sweet dessert, a pinch of salt is essential for balancing flavors. It enhances the sweetness of the sugar and brings out the natural flavors of the raspberries. A small amount of salt can elevate the overall taste of the ice cream, making it more enjoyable.
Optional Garnish
For an extra touch of elegance, consider adding a garnish when serving your no-churn raspberry ice cream. Fresh raspberries, a sprig of mint, or a drizzle of chocolate sauce can enhance both the presentation and flavor of the dish. These simple additions can turn a delicious dessert into an eye-catching masterpiece.
Step-by-Step Preparation Guide
Now that we’ve covered the essential ingredients, let’s move on to the preparation process. Making Delightfully Creamy No-Churn Raspberry Ice Cream is straightforward, and following these steps will ensure your homemade treat turns out perfectly.
Preparing the Raspberry Purée
The first step in creating this delectable ice cream is to prepare the raspberry purée. Start by rinsing the fresh raspberries under cold water to remove any impurities. Once clean, place them in a blender or food processor. Blend until smooth, ensuring that the raspberries are fully puréed for a silky texture.
For those who prefer a seedless ice cream, straining the purée through a fine mesh sieve is recommended. This process removes the seeds, resulting in a smoother mixture. While straining is optional, it can significantly enhance the mouthfeel of the final product. If you enjoy the texture of raspberry seeds, feel free to skip this step.
Whipping the Cream
Next, it’s time to whip the heavy whipping cream. Begin by pouring the cream into a large mixing bowl. Using an electric mixer, beat the cream on medium-high speed until soft peaks form. This process usually takes around 2-3 minutes. Soft peaks indicate that the cream has thickened but is not yet at its maximum volume.
To achieve the ideal texture for your ice cream, continue beating until stiff peaks form. Stiff peaks are characterized by peaks that stand upright without collapsing. This incorporation of air is crucial for creating a light and fluffy ice cream, ensuring a delightful experience with every spoonful.
Combining Ingredients
Once the cream is whipped to perfection, it’s time to combine the ingredients. In a separate bowl, mix together the sweetened condensed milk, granulated sugar, vanilla extract, and a pinch of salt. Stir until the sugar is dissolved and the mixture is smooth.
Next, gently fold in the whipped cream into the condensed milk mixture. It’s important to do this carefully to maintain the airy texture of the whipped cream. Use a spatula to fold the ingredients together, ensuring that no streaks of cream remain.
Finally, add the raspberry purée to the mixture, folding it in gently until just combined. This will create a beautiful marbled effect, showcasing the vibrant raspberry color throughout the creamy base.
With these steps completed, your homemade Delightfully Creamy No-Churn Raspberry Ice Cream is nearly ready to freeze and enjoy!
Detailed Instructions for Whisking and Folding Techniques
To achieve the perfect texture in your no-churn raspberry ice cream, mastering the whisking and folding techniques is crucial. Start by using a large mixing bowl and a whisk or an electric mixer. Whisk the heavy cream until soft peaks form—this process incorporates air into the cream, making your ice cream light and fluffy. Be careful not to overwhip, as this can lead to a grainy texture.
Once the cream is whipped, it’s time to fold in your sweetened condensed milk. Use a rubber spatula to gently incorporate the two mixtures. The key here is to use a folding motion—this involves gently lifting the whipped cream from the bottom of the bowl and folding it over the condensed milk. Repeat this motion, turning the bowl as you go, until you see no streaks of white. This gentle incorporation is vital to maintain the airiness of the whipped cream, ensuring your ice cream remains light and creamy.
Adding Raspberry Purée
Next, let’s introduce our star ingredient: the raspberry purée. To make this, blend fresh or frozen raspberries until smooth, then strain the mixture to remove the seeds if desired. When adding the purée to your ice cream base, use a spoon to dollop the purée in several spots over the mixture.
To create a beautiful marbled effect, use the same folding technique. Gently swirl the purée into the ice cream base without overmixing; the goal is to have distinct ribbons of raspberry throughout the mixture. Visual cues for proper mixing include seeing the vibrant pink of the raspberry purée against the white cream. If you see too much pink, you may have overmixed, which can lead to a homogenized color rather than the appealing marbled effect.
Chilling and Freezing
Once your mixture is beautifully swirled, it’s time to transfer it into a suitable container for freezing. A metal loaf pan or a shallow plastic container works best, as these shapes allow for even freezing. Cover the container tightly with plastic wrap or a lid to prevent ice crystals from forming.
Freezing time is essential for achieving the right consistency. Allow your ice cream to freeze for at least 4-6 hours, or overnight for best results. During this time, the mixture will solidify and develop its creamy texture.
Serving Suggestions
When it comes to serving your delightful raspberry ice cream, the presentation can elevate the experience. You can serve the ice cream in bowls or cones, and garnishing it can add an extra touch of elegance. Consider topping your scoops with fresh mint leaves for a pop of color, chocolate shavings for a hint of richness, or a drizzle of chocolate sauce for added decadence.
For a more indulgent dessert experience, pair your no-churn raspberry ice cream with other treats. It complements brownies beautifully, enhancing their fudgy texture with a refreshing, fruity contrast. Alternatively, serve it alongside slices of rich chocolate cake or a tart to create a delightful dessert platter that’s sure to impress your guests.
Nutritional Information
Understanding the nutritional content of your homemade raspberry ice cream is essential, especially if you’re mindful of dietary needs. Each serving typically provides a delightful balance of calories, fats, and sugars. A standard serving of this ice cream contains around 200-250 calories, depending on the ingredients used.
Be aware of potential allergens such as dairy in the heavy cream and sweetened condensed milk. If you have guests with lactose intolerance or dairy allergies, consider using coconut cream as a substitute. This alternative not only makes the ice cream dairy-free but also adds a subtle tropical flavor.
Storing Leftovers
To keep your homemade ice cream fresh and enjoyable, proper storage is key. If you have leftovers, ensure the ice cream is stored in an airtight container. This will help prevent freezer burn and maintain the quality of your ice cream.
When it’s time to serve the ice cream after it has been frozen, allow it to sit at room temperature for about 5-10 minutes. This will soften it slightly and make it easier to scoop. For long-term storage, consider placing a piece of parchment paper directly on the surface of the ice cream before sealing the container. This helps minimize ice crystal formation, keeping your dessert smooth and creamy.
Conclusion
There’s something truly special about making homemade no-churn raspberry ice cream. The simplicity of the recipe, combined with the joy of creating something delicious, makes it a delightful experience. This ice cream not only serves as a refreshing treat on a warm day but also provides an opportunity for creativity in the kitchen.
Don’t hesitate to experiment with different flavors and ingredients. Try adding other fruits for a mixed berry ice cream or incorporating a splash of vanilla extract for added depth. The possibilities are endless, and each variation allows for personalization to suit your taste or that of your loved ones.
As you whip up this creamy delight, take a moment to savor the process. Cooking is about more than just the final product; it’s about sharing moments with family and friends, enjoying delicious flavors, and creating memories that last a lifetime. Enjoy your homemade raspberry ice cream and the joy that comes with it!
